Download Unifi Controller
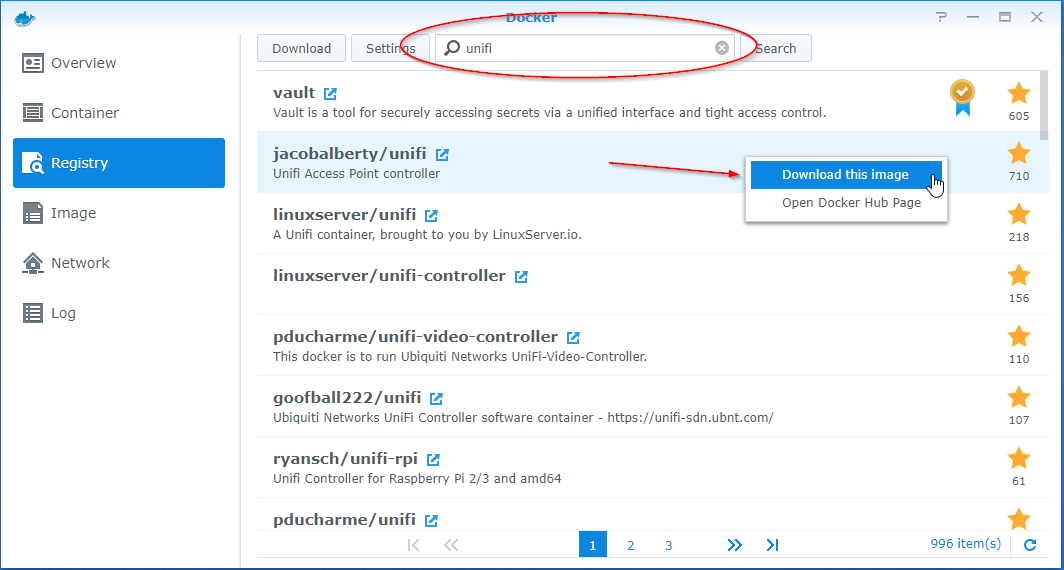
แอพเปิด Docker ขึ้นมา (ถ้ายังไม่มีสามารถโหลดได้จาก Package Center ได้เลย) แล้วค้นหาด้วย keyword unifi จากนั้นขวาที่แพคเกจ jacobalberty/unifi
แล้วเลือก Download this image
![Unifi on Synology](/images/posts/install-unifi-controller-on-synology/01-download-image.png)
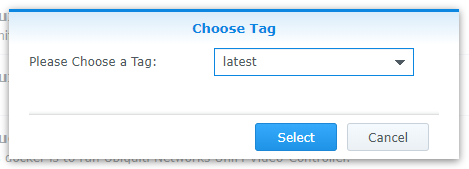
จะมี Popup ขึ้นเลือก latest แล้วกด select ได้เลย
![Unifi on Synology](/images/posts/install-unifi-controller-on-synology/02-select-tag.png)
รอจนเสร็จ
![Unifi on Synology](/images/posts/install-unifi-controller-on-synology/03-download-image.png)
Setting Unifi Controller
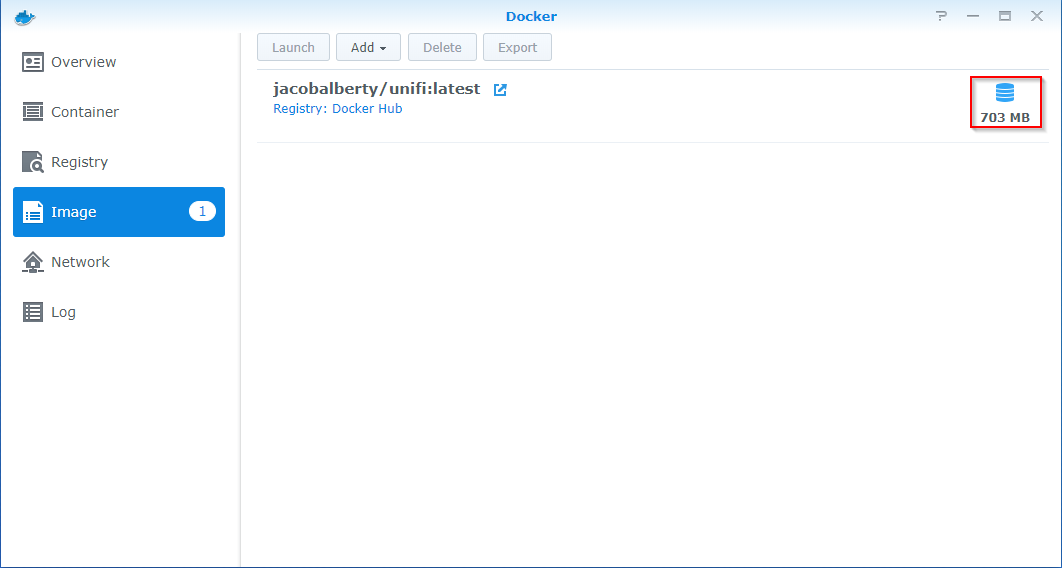
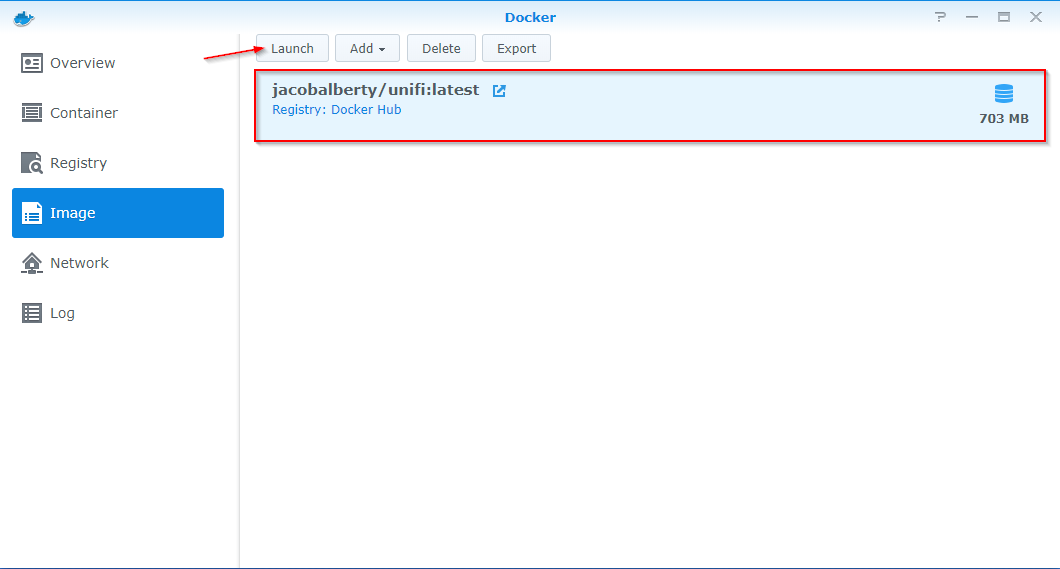
รอจน Download เสร็จ โดยดูได้จากเมื่อรูป Disk อยู่กระพิบแล้ว จากนั้นกด Lanch
![Unifi on Synology](/images/posts/install-unifi-controller-on-synology/04-launch-image.png)
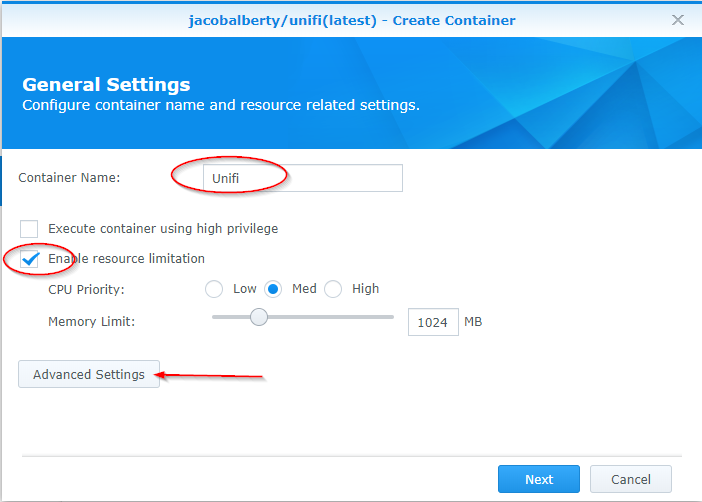
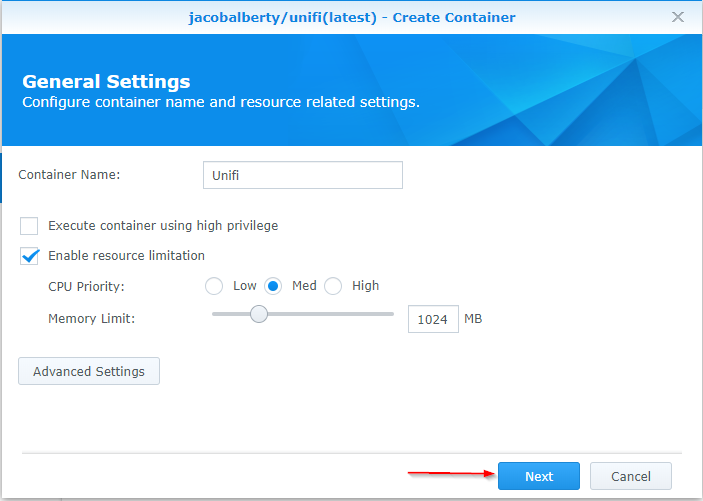
ตั้งชื่อ Container, ติ๊กถูก Enable resource limitation แล้วกดปุ่ม Advanced Settings
![Unifi on Synology](/images/posts/install-unifi-controller-on-synology/05-name-container.png)
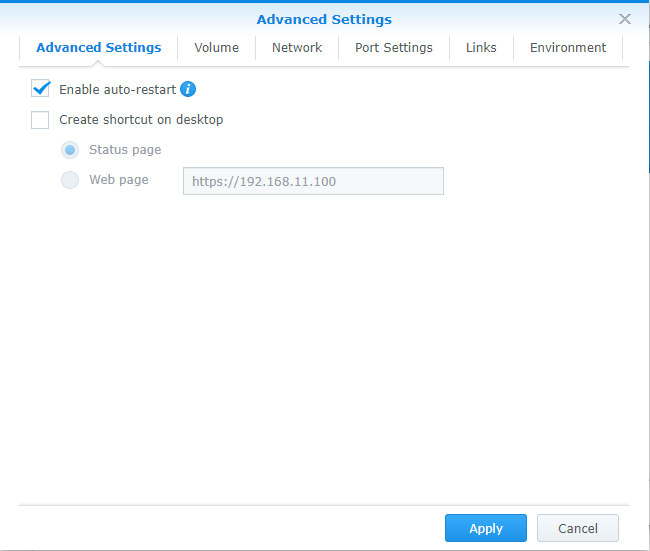
ติ๊กถูก Enable auto-restart เพื่อให้ Container เปิดอัตโนมัติในกรณีที่ NAS reboot ตัวเอง
![Unifi on Synology](/images/posts/install-unifi-controller-on-synology/06-advanced-settings.png)
คลิกที่แท็บ Volume คลิกปุ่ม Add Folder เพื่อเลือกที่เก็บไฟล์ของ Container
![Unifi on Synology](/images/posts/install-unifi-controller-on-synology/07-volume-add-folder.png)
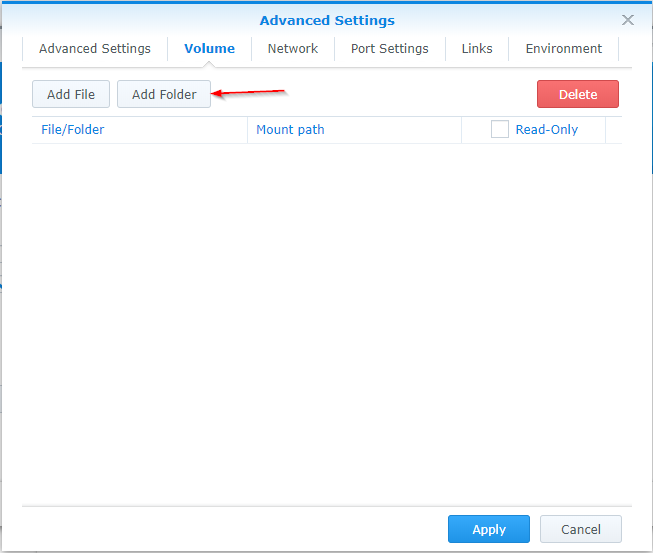
Create folder แล้วตั้งชื่อที่ต้องการ หลังจากสร้างเสร็จแล้ว กด Select
![Unifi on Synology](/images/posts/install-unifi-controller-on-synology/08-create-folde.png)
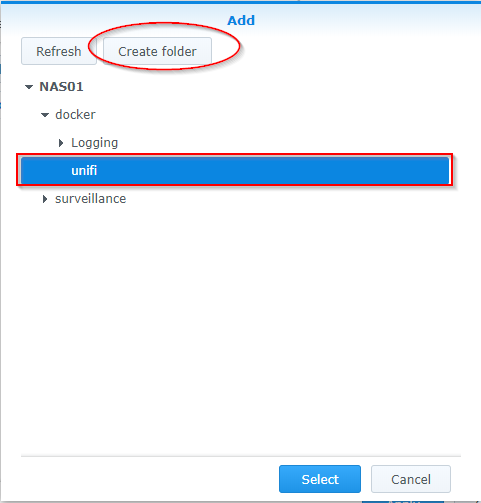
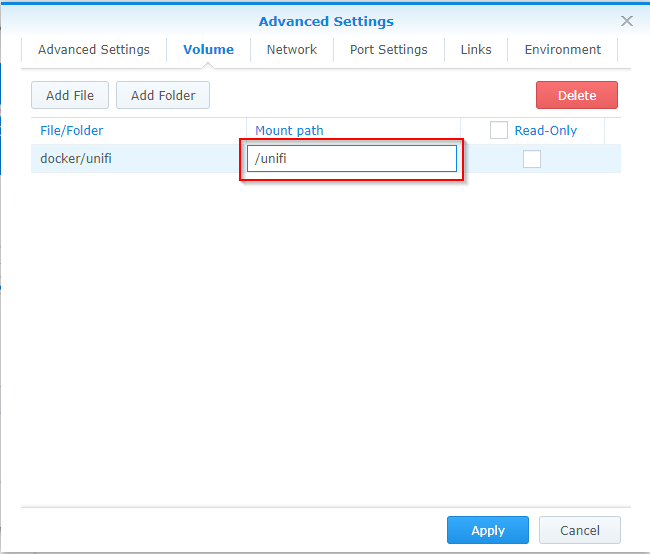
ในช่อง Mount path ให้ใส่ /unifi
ก็คือชื่อ Docker ที่เราสร้างนั่นแหละ
![Unifi on Synology](/images/posts/install-unifi-controller-on-synology/09-add-mount-path.png)
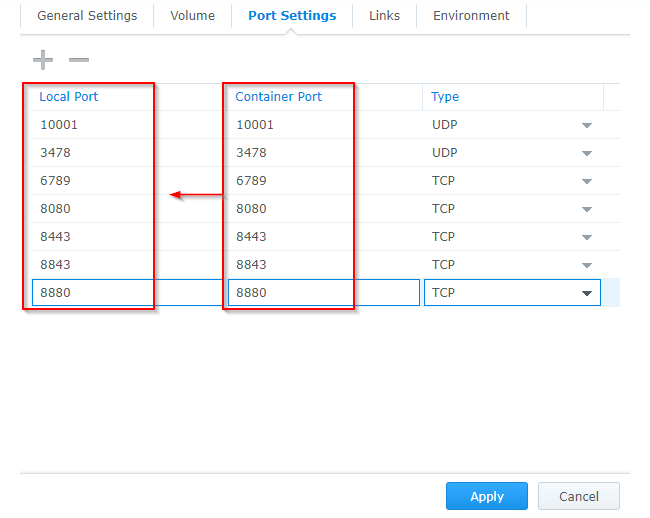
คลิกที่แท็บ Port settings ตั้งค่า Local Port ให้เหมือนกับ Container Port
![Unifi on Synology](/images/posts/install-unifi-controller-on-synology/10-configure-port-settings-edit.png)
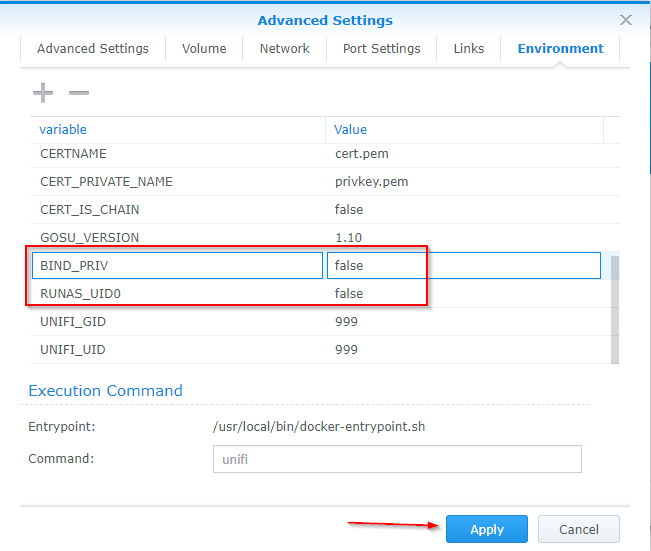
แท็บ Environment ทำการเปลี่ยน value ของ BIND_PRIV และ RUNAS_UID0 เป็น false
แล้วกด Apply
![Advanced Settings](/images/posts/install-unifi-controller-on-synology/11-configure-environment.png)
กลับมาที่หน้า General Settings กด Next
![General Settings](/images/posts/install-unifi-controller-on-synology/12-select-next.png)
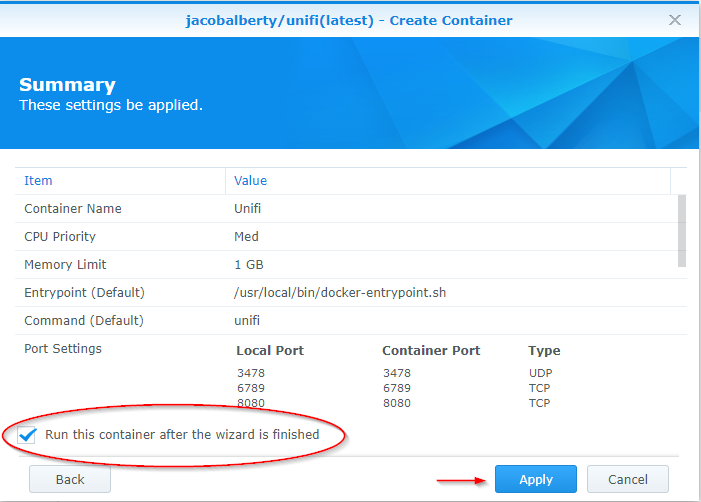
หน้า Summary ติ๊กถูก Run this container after the wizard is finished แล้วกด Apply
![Summary](/images/posts/install-unifi-controller-on-synology/13-apply-and-run-container.png)
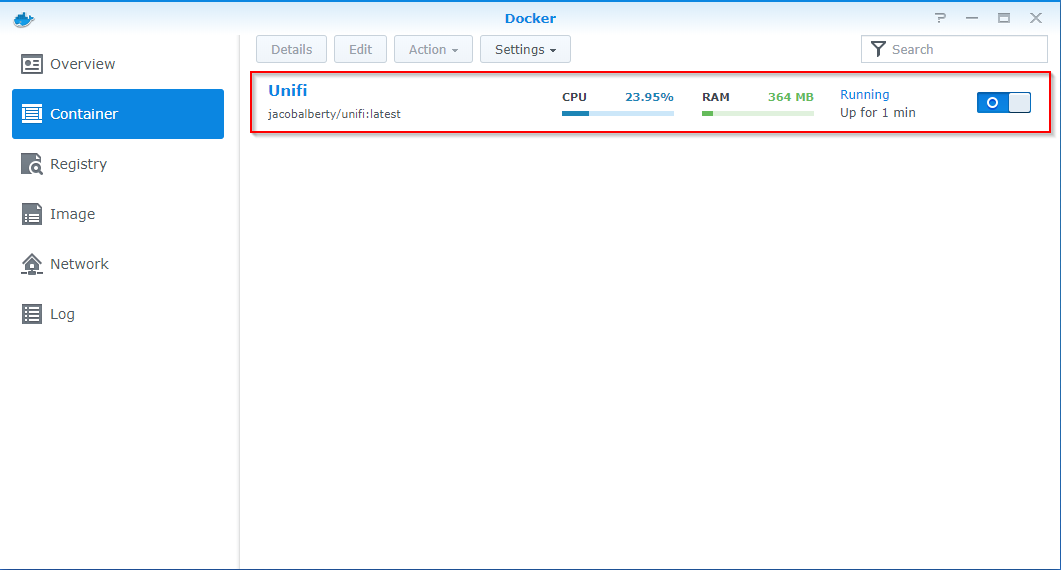
คลิกที่ Container จากเห็นชื่อ Unifi ที่เราสร้าง รอมันเริ่มการทำงานสักครู่ (โดยปกติไม่เกิน 5 นาที)
![Run docker](/images/posts/install-unifi-controller-on-synology/14-select-container.png)
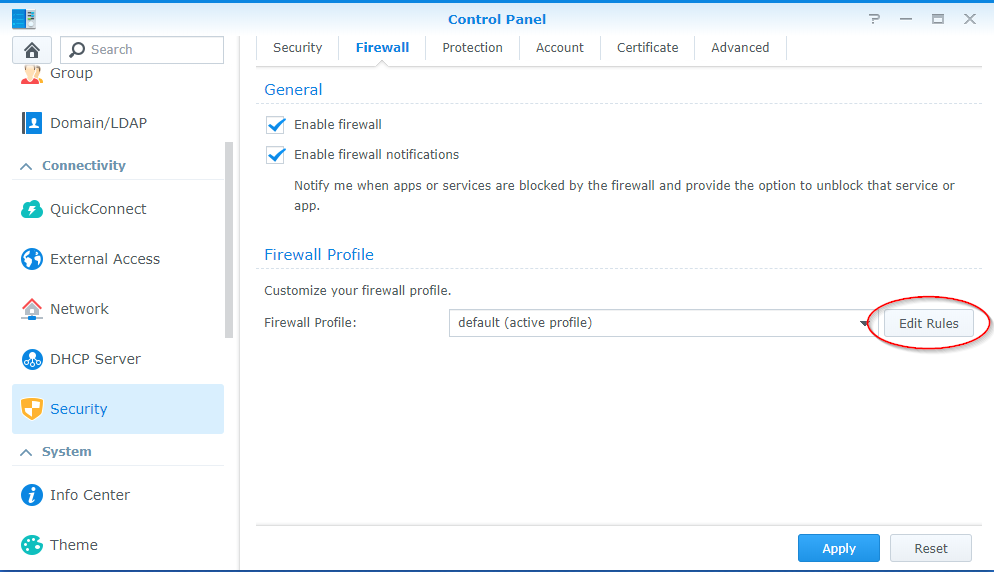
- ในการใช้งานจำเป็นต้องเปิด port ที่ Firewall โดยเข้าไปที่ Control Panel :arrow_right: Security :arrow_right: Firewall แล้วคลิก Edit Rules
![Open Port Firewall](/images/posts/install-unifi-controller-on-synology/15-edit-firewall.png)
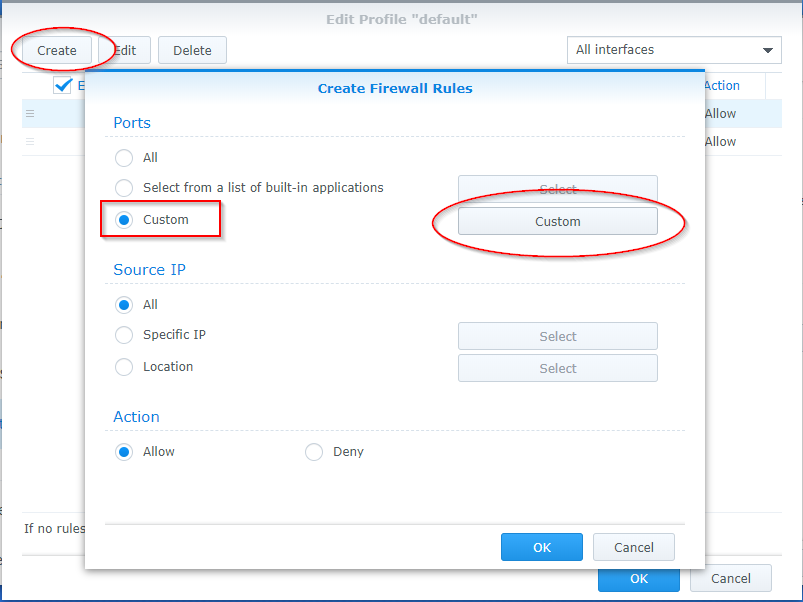
ในหน้า Edit Profile คลิก Create จะขึ้นหน้า Create Firewall Rules ขึ้นมา เลือก Custom แล้วกดปุ่ม Custom
![Open Port Firewall](/images/posts/install-unifi-controller-on-synology/16-customrules.png)
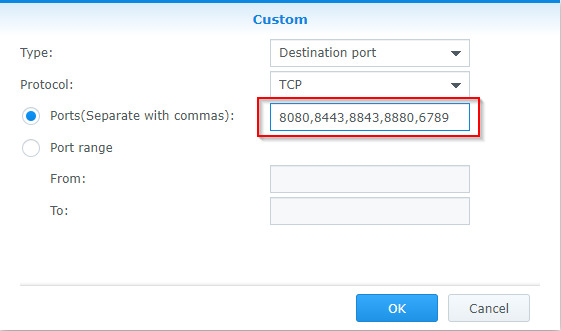
เพิ่มในส่วนของ TCP ports: 8080,8443,8843,8880,6789 แล้วกด OK สองครั้ง
![Open Port Firewall](/images/posts/install-unifi-controller-on-synology/17.-TCP-ports.png)
เข้าหน้า Edit Profile อีกรอบ คลิก Create จะขึ้นหน้า Create Firewall Rules ขึ้นมา เลือก Custom แล้วกดปุ่ม Custom
![Open Port Firewall](/images/posts/install-unifi-controller-on-synology/16-customrules.png)
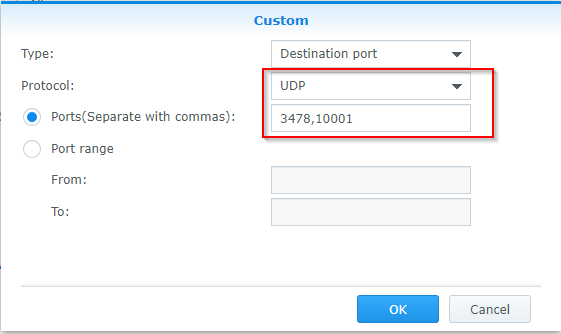
เพิ่ม UDP ports เลือก UDP แล้วใส่ Port 3478,10001 กด OK สามครั้ง
![Open Port Firewall](/images/posts/install-unifi-controller-on-synology/19.-UDP-ports.png)
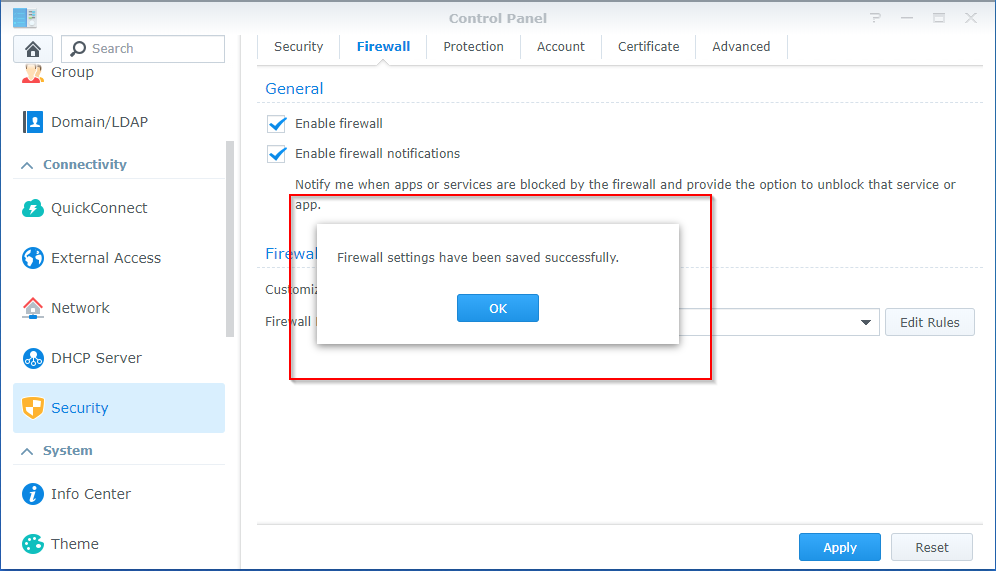
จะเห็น Popup Firewall settings have been saved successfully กด OK และลองเข้าใช้งาน Unifi Controller ได้เลย หากเข้าไม่ได้ลอง Reboot Nas ดูสักรอบ
![Open Port Firewall](/images/posts/install-unifi-controller-on-synology/20.-Firewall-settings-saved-succesfully.png)
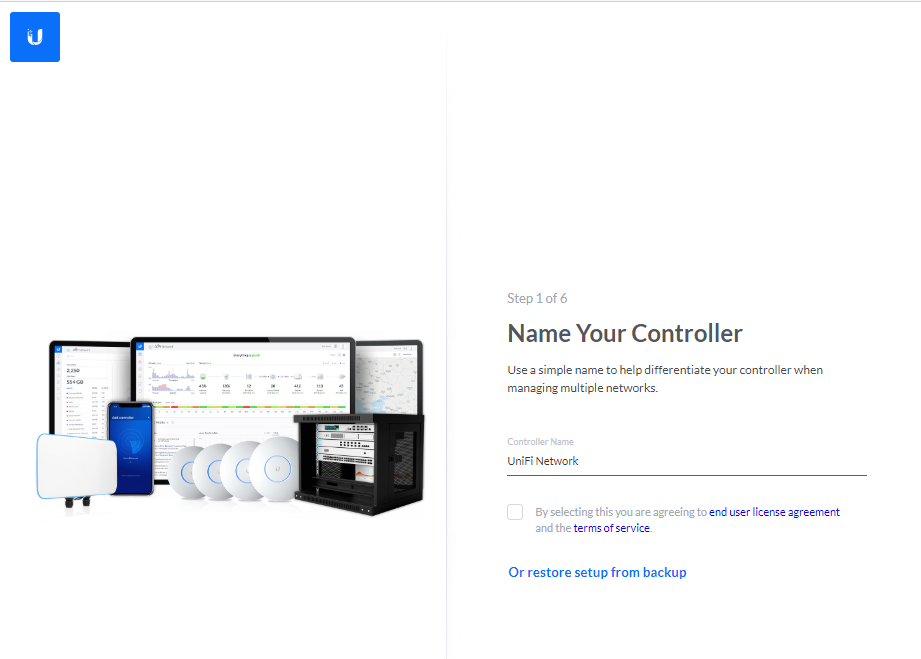
เปิด Browser ขึ้นมา แล้วเข้า URL https://<NAS_IP>:8443
ถ้าขึ้นหน้าแบบนี้ก็เป็นอันใช้ได้ จะตั้งค่าใหม่หรือ restore ค่าก็ตามที่ท่านสะดวกเลย
![Open Port Firewall](/images/posts/install-unifi-controller-on-synology/21-start-configuring-container.png)