ในบทความนี้เราจะมาลอง Deploy Next.js บน Digital Ocean กันดูบ้าง จากบทความครั้งก่อนที่ผมได้ลองสร้าง Droplet บน Digital Ocean ไป โดยผมจะข้ามการสร้าง Droplet ไป เข้าสู่การ ssh เข้าไปที่ Droplet กันเลย โดย Droplet ที่ผมใช้จะเป็น Ubuntu 22.10
Install Node.js
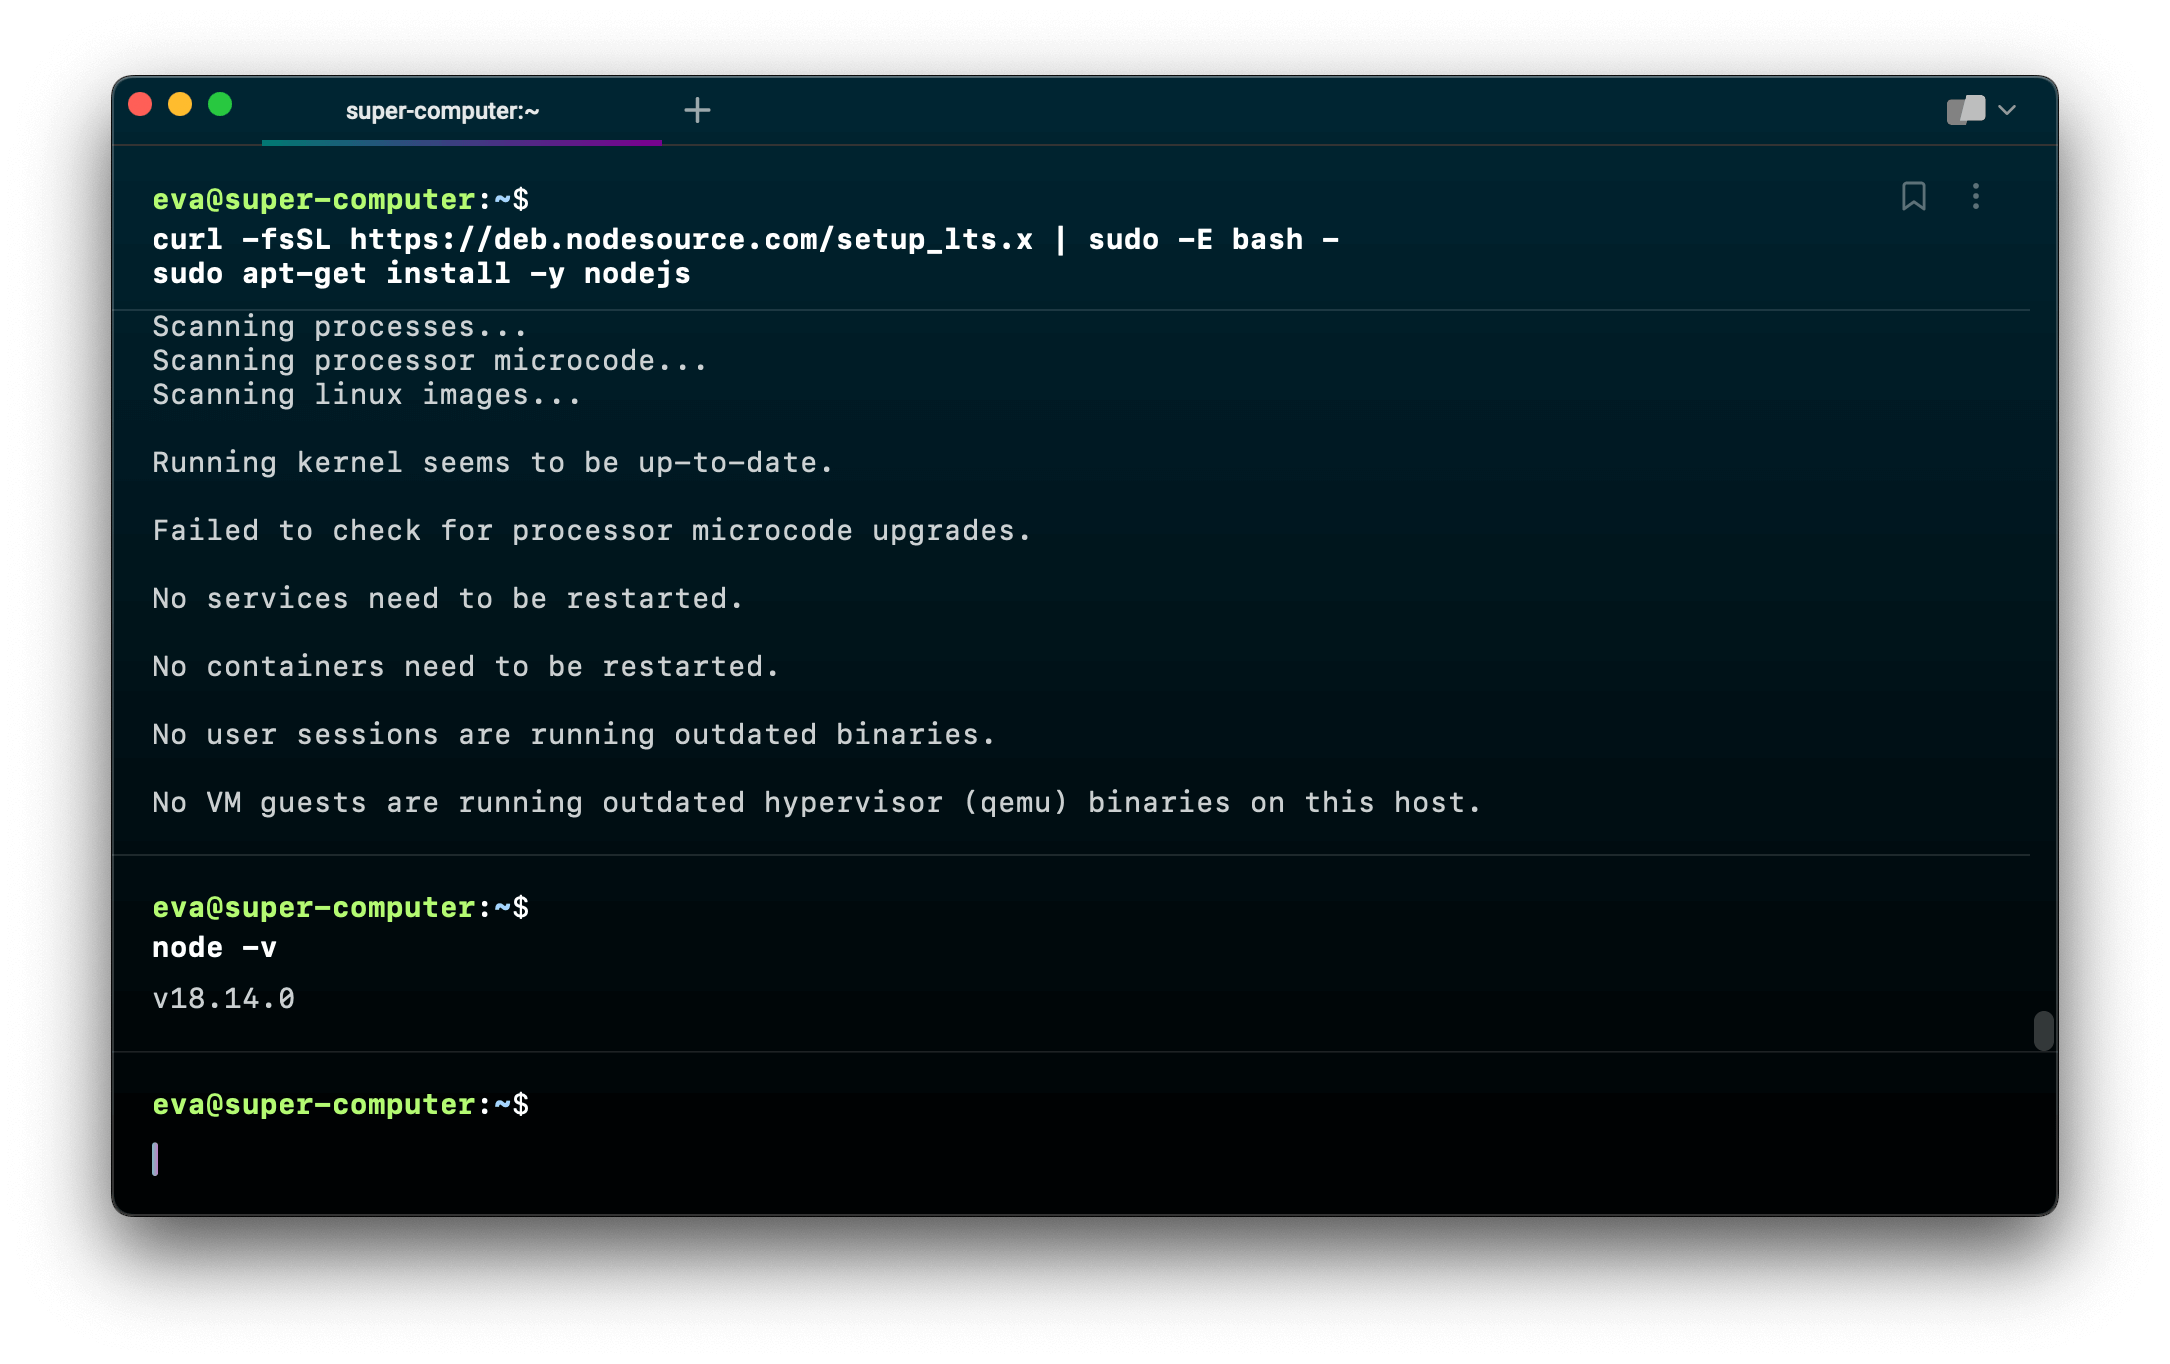
เรามาเริ่มจากการติดตั้ง Node.js กันก่อนเลย โดยผมจะใช้ Node.js แบบ LTS
curl -fsSL https://deb.nodesource.com/setup_lts.x | sudo -E bash -
sudo apt-get install -y nodejs
ซึ่งเวอร์ชั่นปัจจุบันจะเป็น v18.14.0 โดยสามารถตรวจสอบได้ด้วยคำสั่ง node -v
Install Yarn
ผมจะใช้ Yarn ในการสร้าง Next.js Project แทน npm ดังนั้นเราจะต้องติดตั้ง Yarn กันก่อน
sudo npm install -g yarn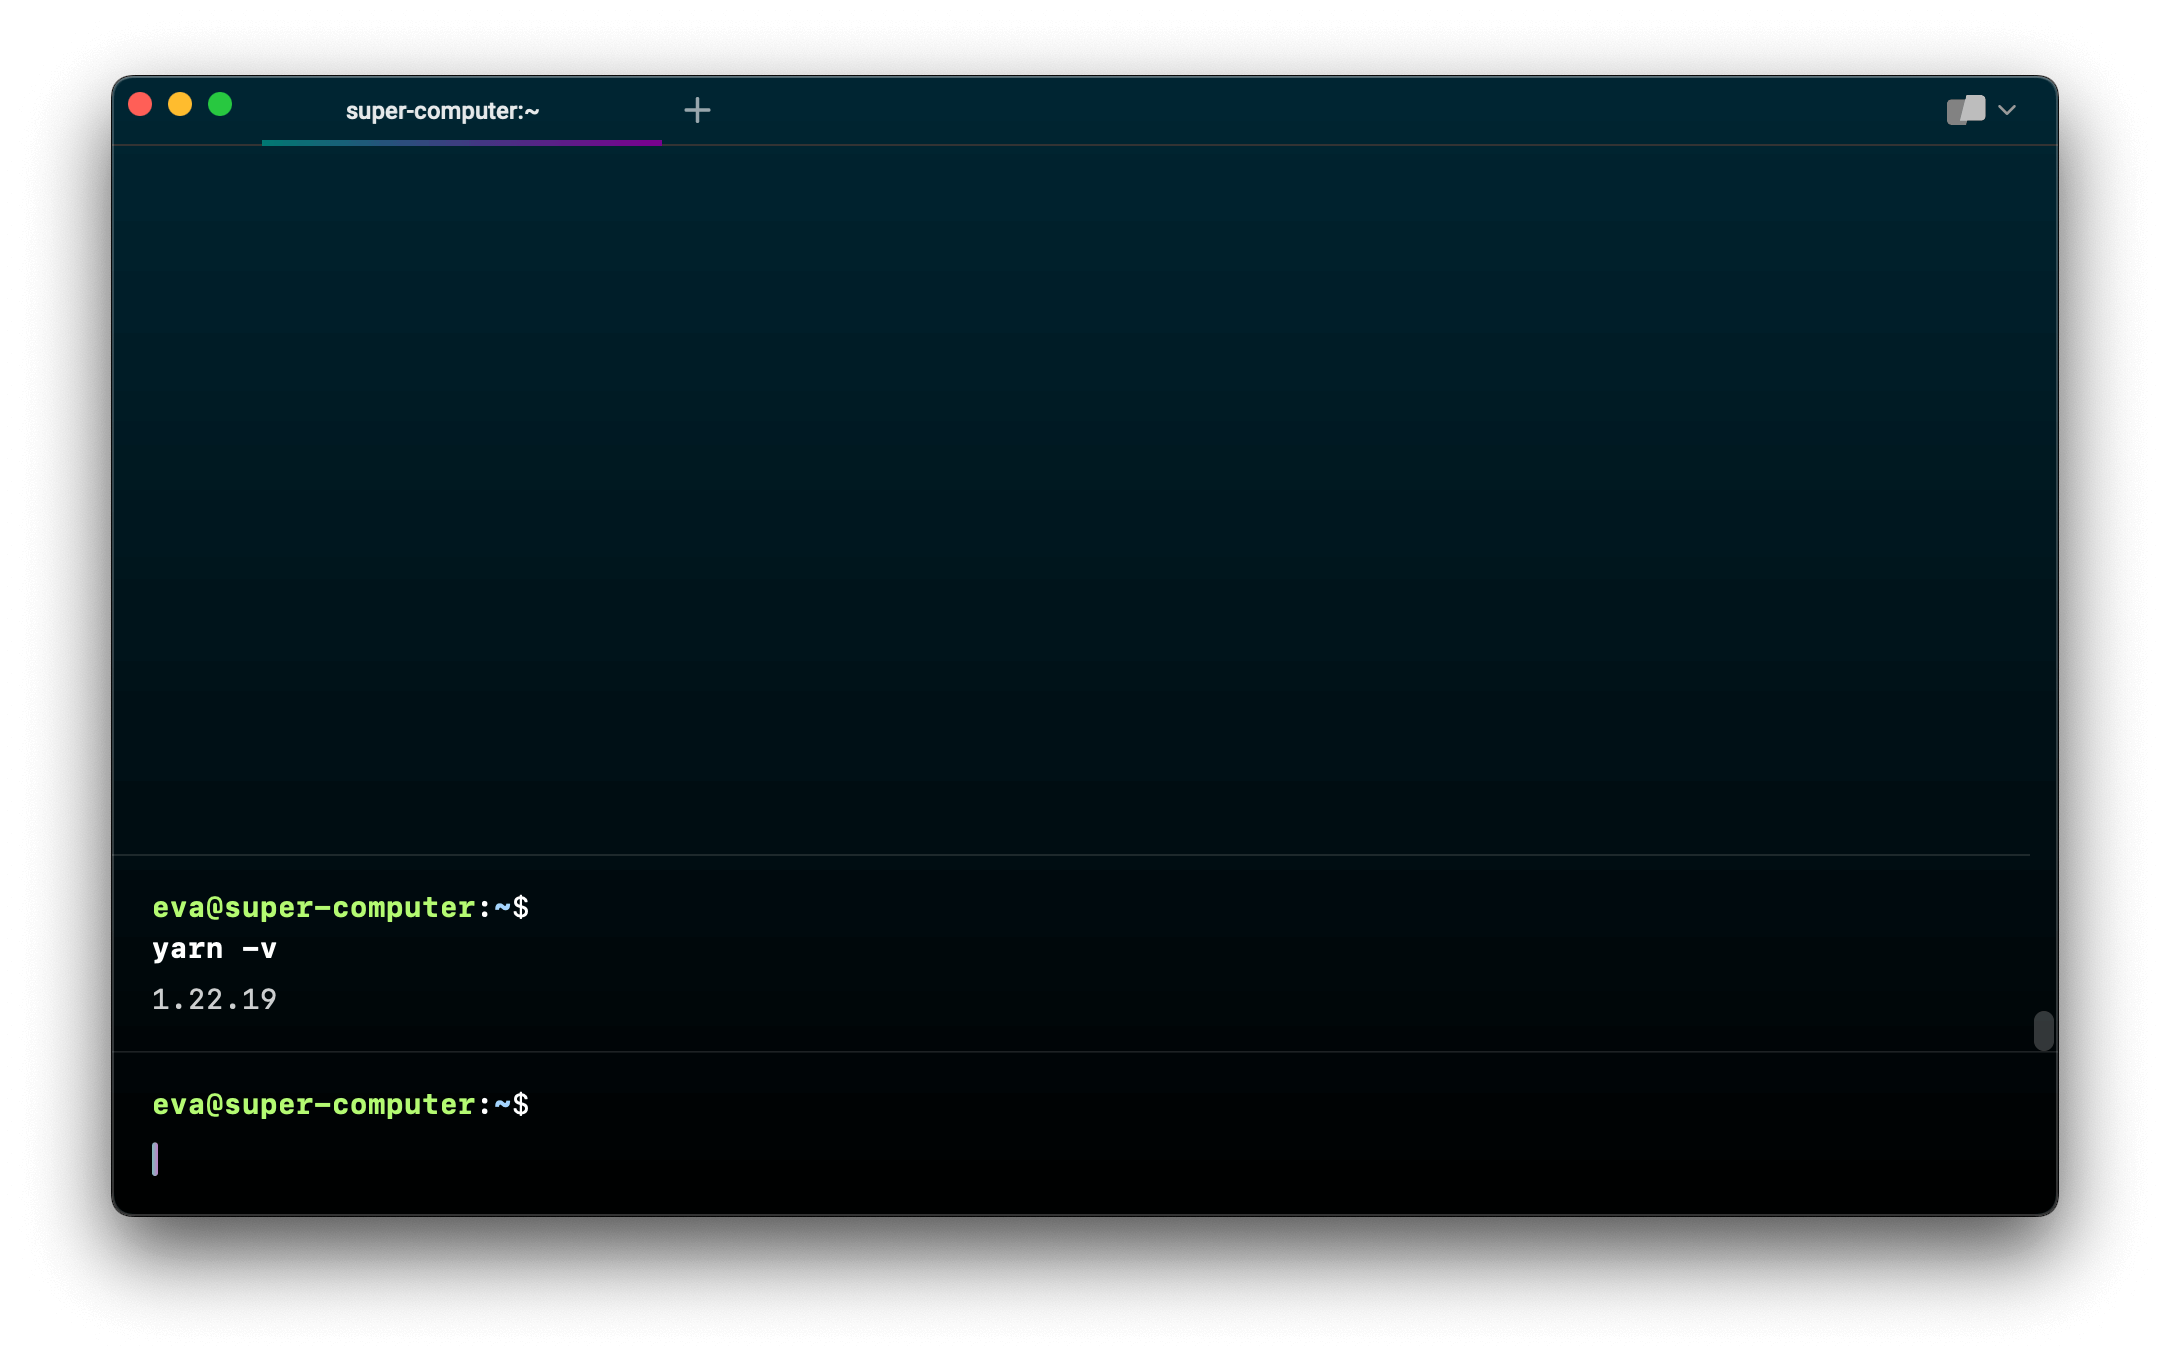
Create Next.js Project
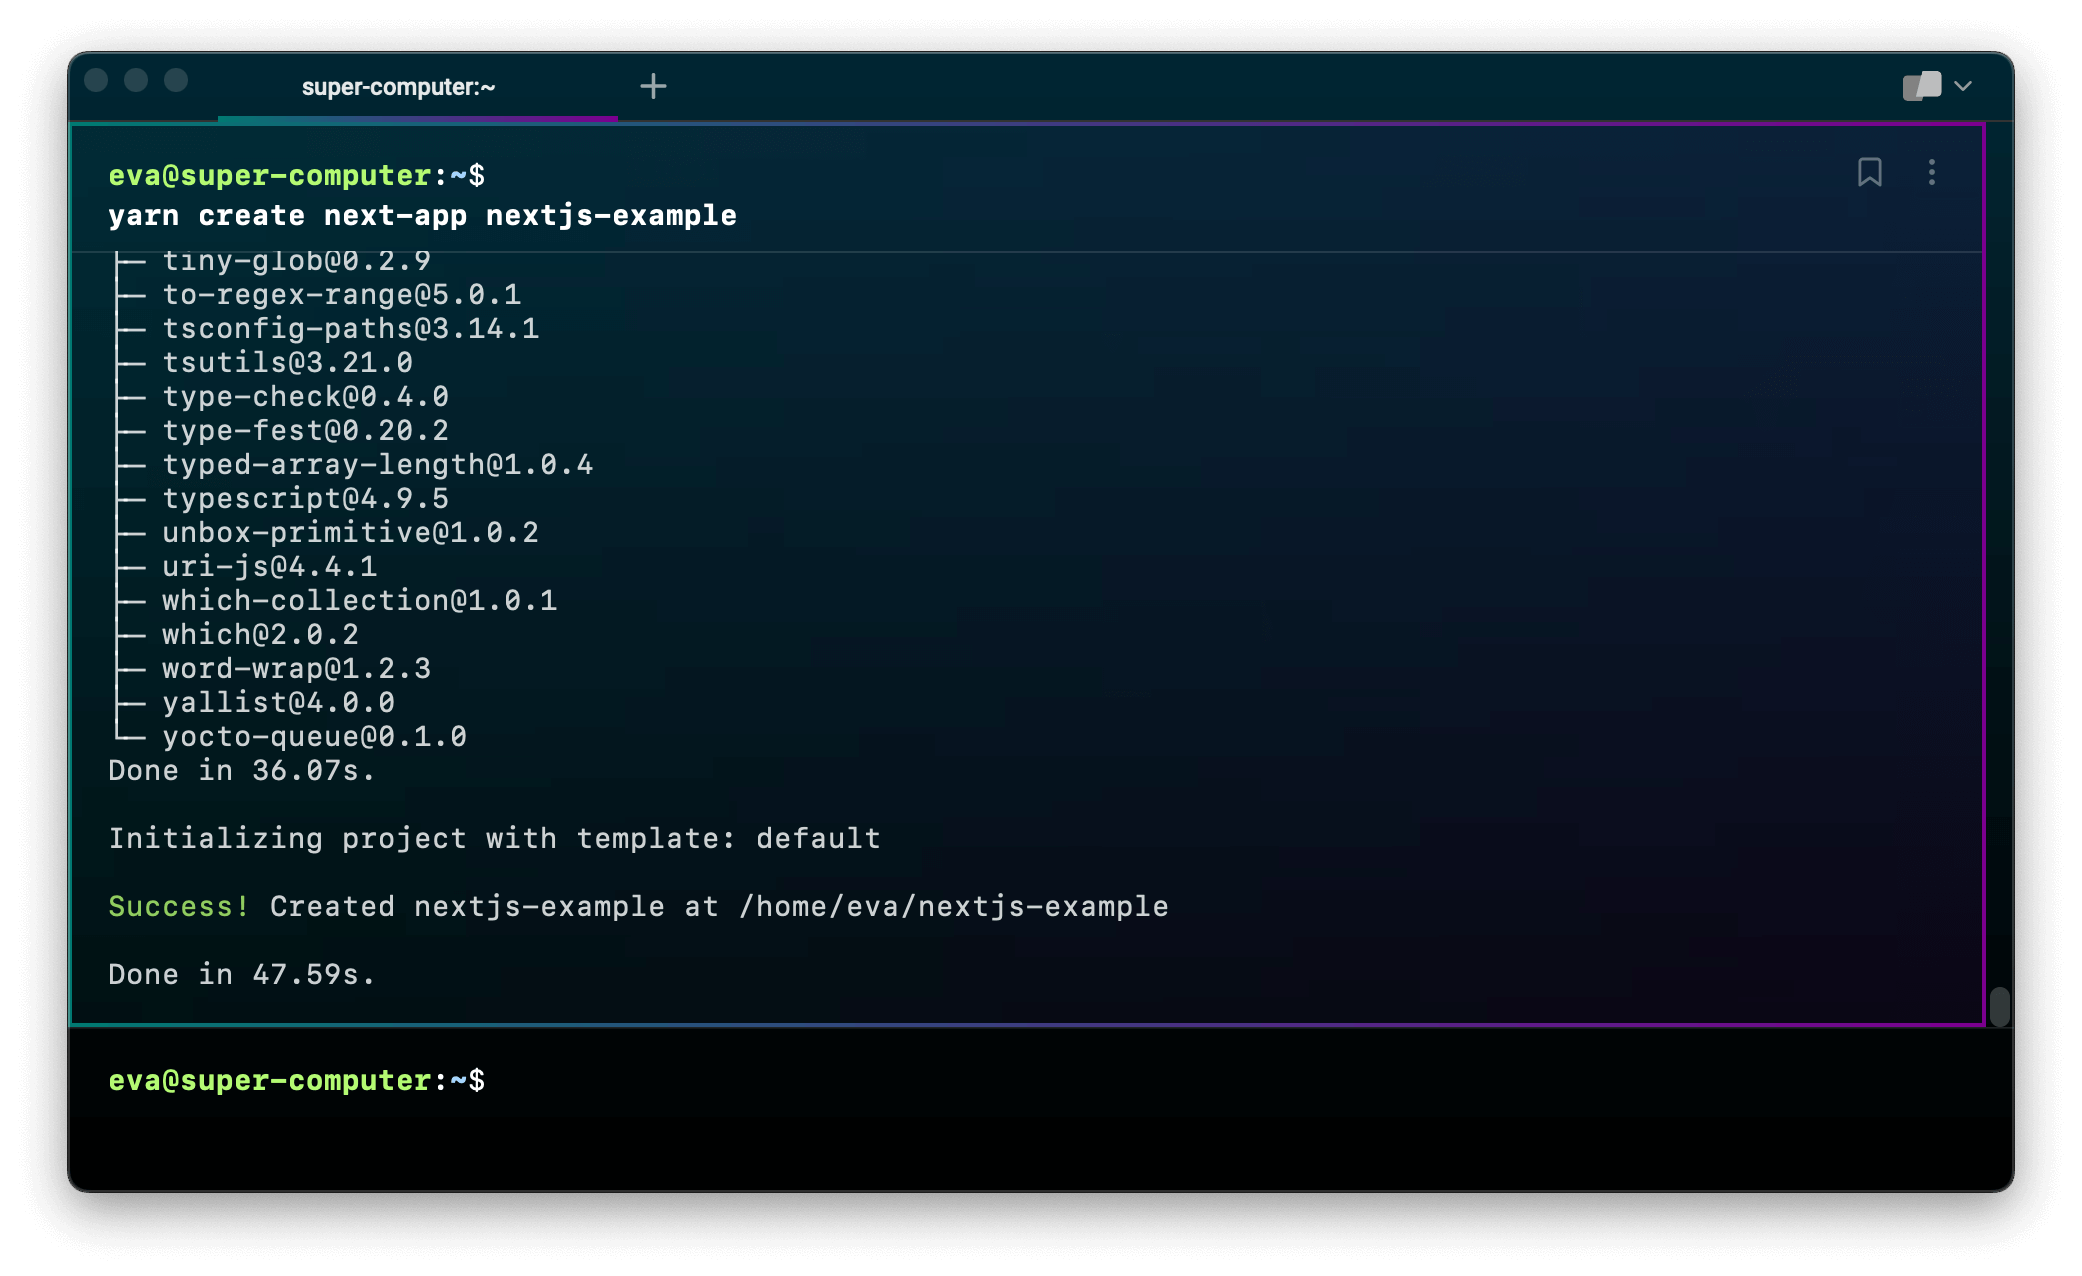
จากนั้นเราจะสร้าง Next.js Project ด้วยคำสั่งตามนี้ โดยผมจะใช้ชื่อ Project ว่า nextjs-example
yarn create next-app nextjs-exampleโดยผมจะใช้สูตร Yes, Yes, No, No ในการติดตั้ง 😅


ถ้าขึ้นแบบนี้ก็แสดงว่าติดตั้งเรียบร้อย
จากนั้นเราจะเข้าไปที่โฟลเดอร์ของ Project ด้วยคำสั่ง
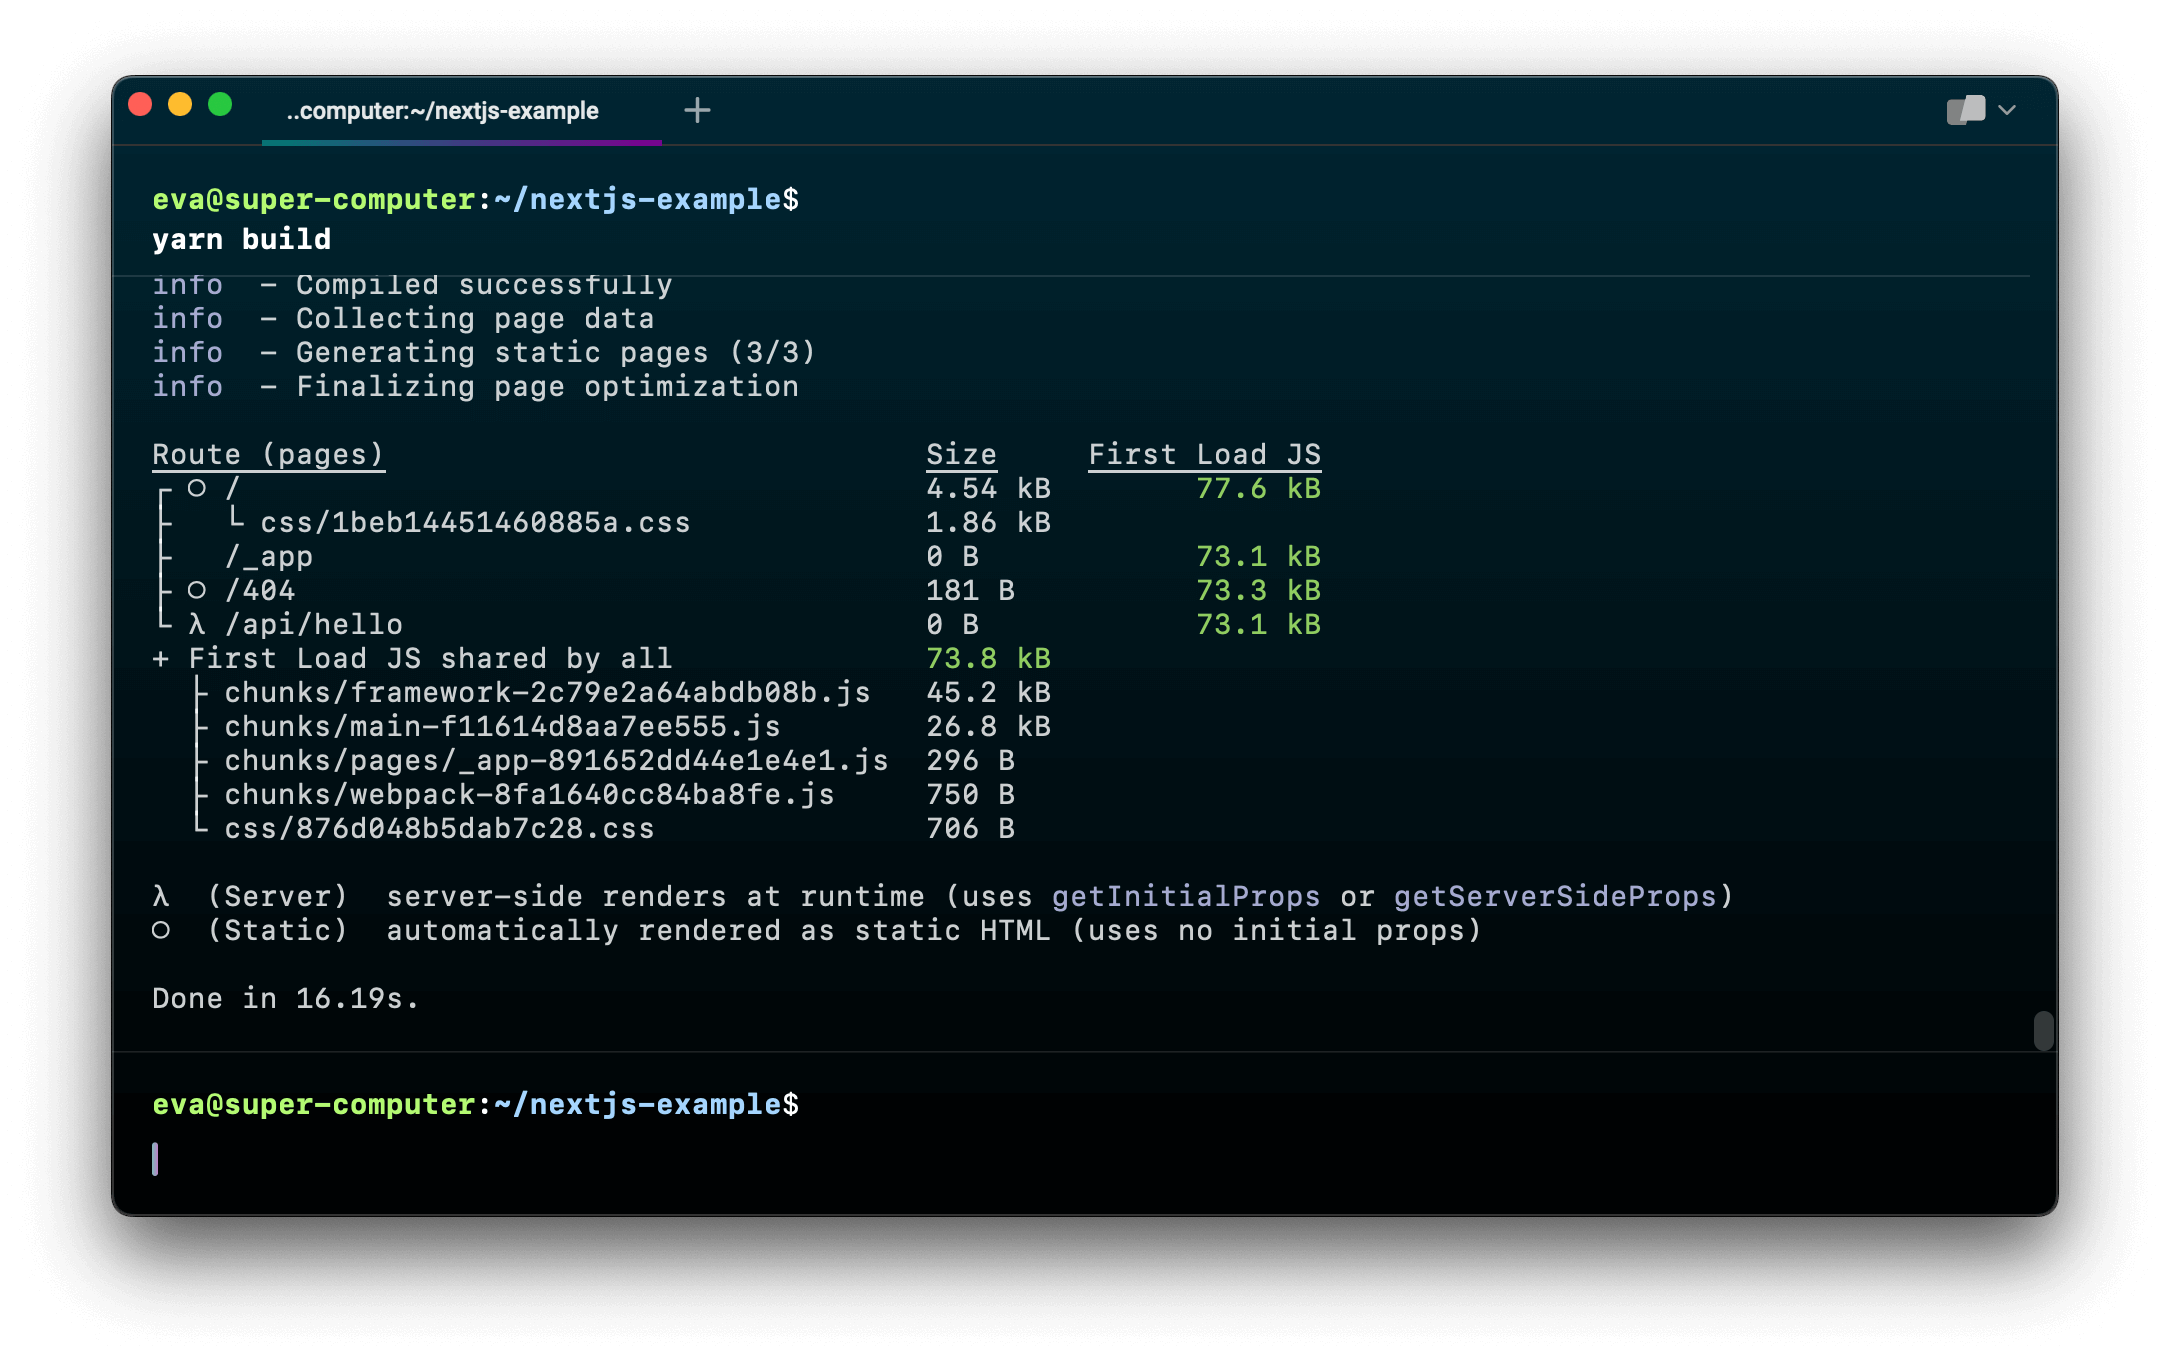
cd nextjs-exampleและ Build Project ด้วยคำสั่ง
yarn build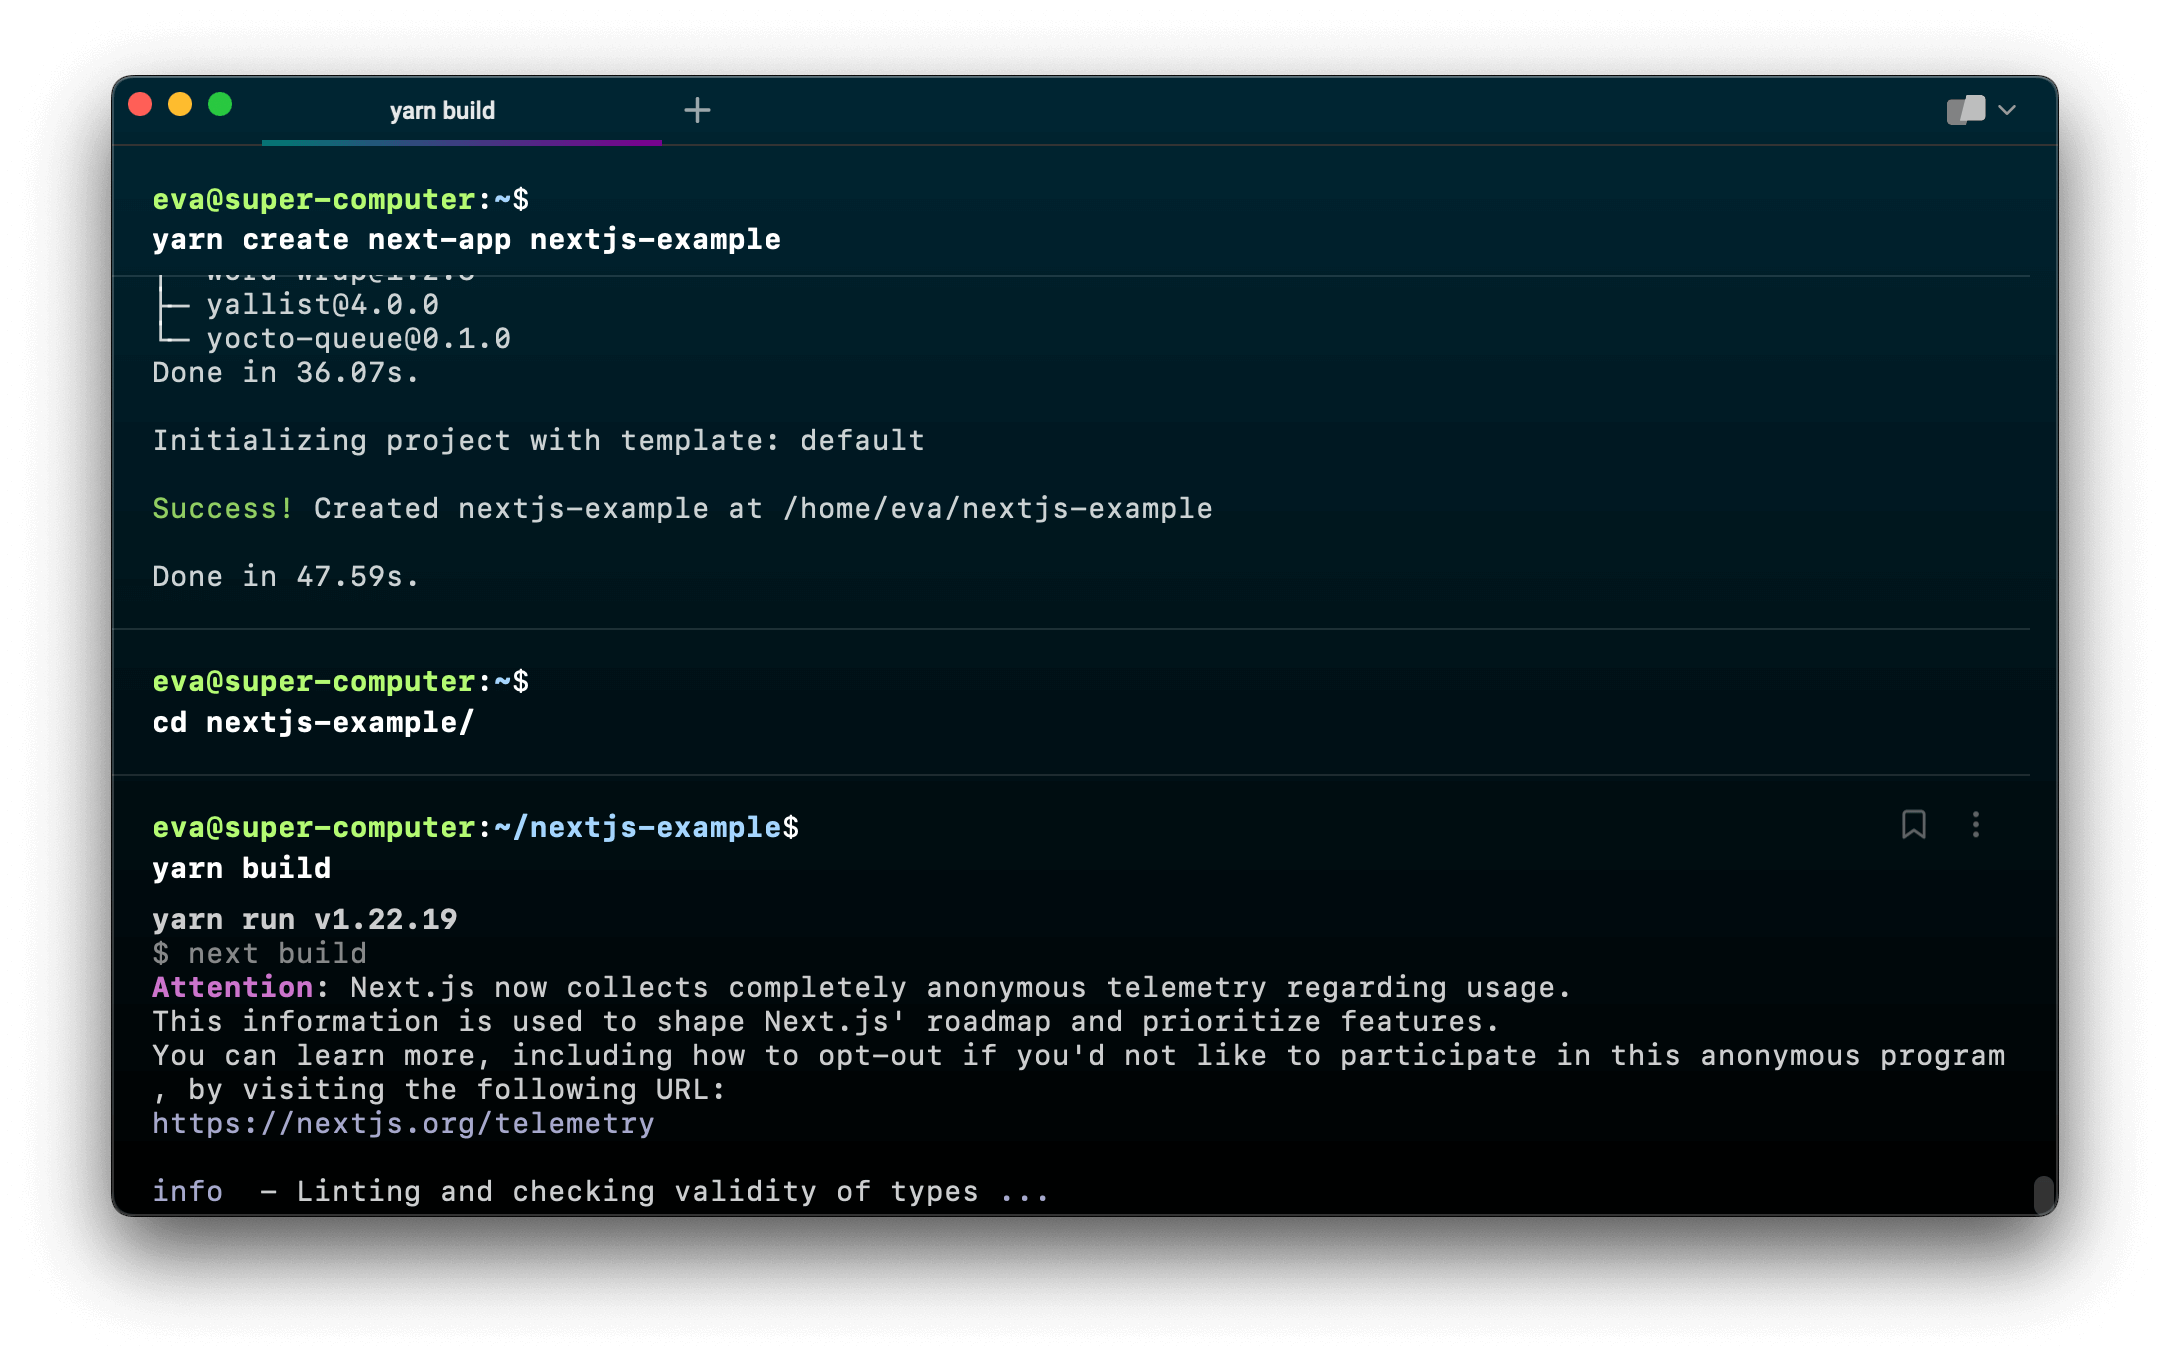
ขึ้นแบบก็แสดงว่า Build เสร็จเรียบร้อย
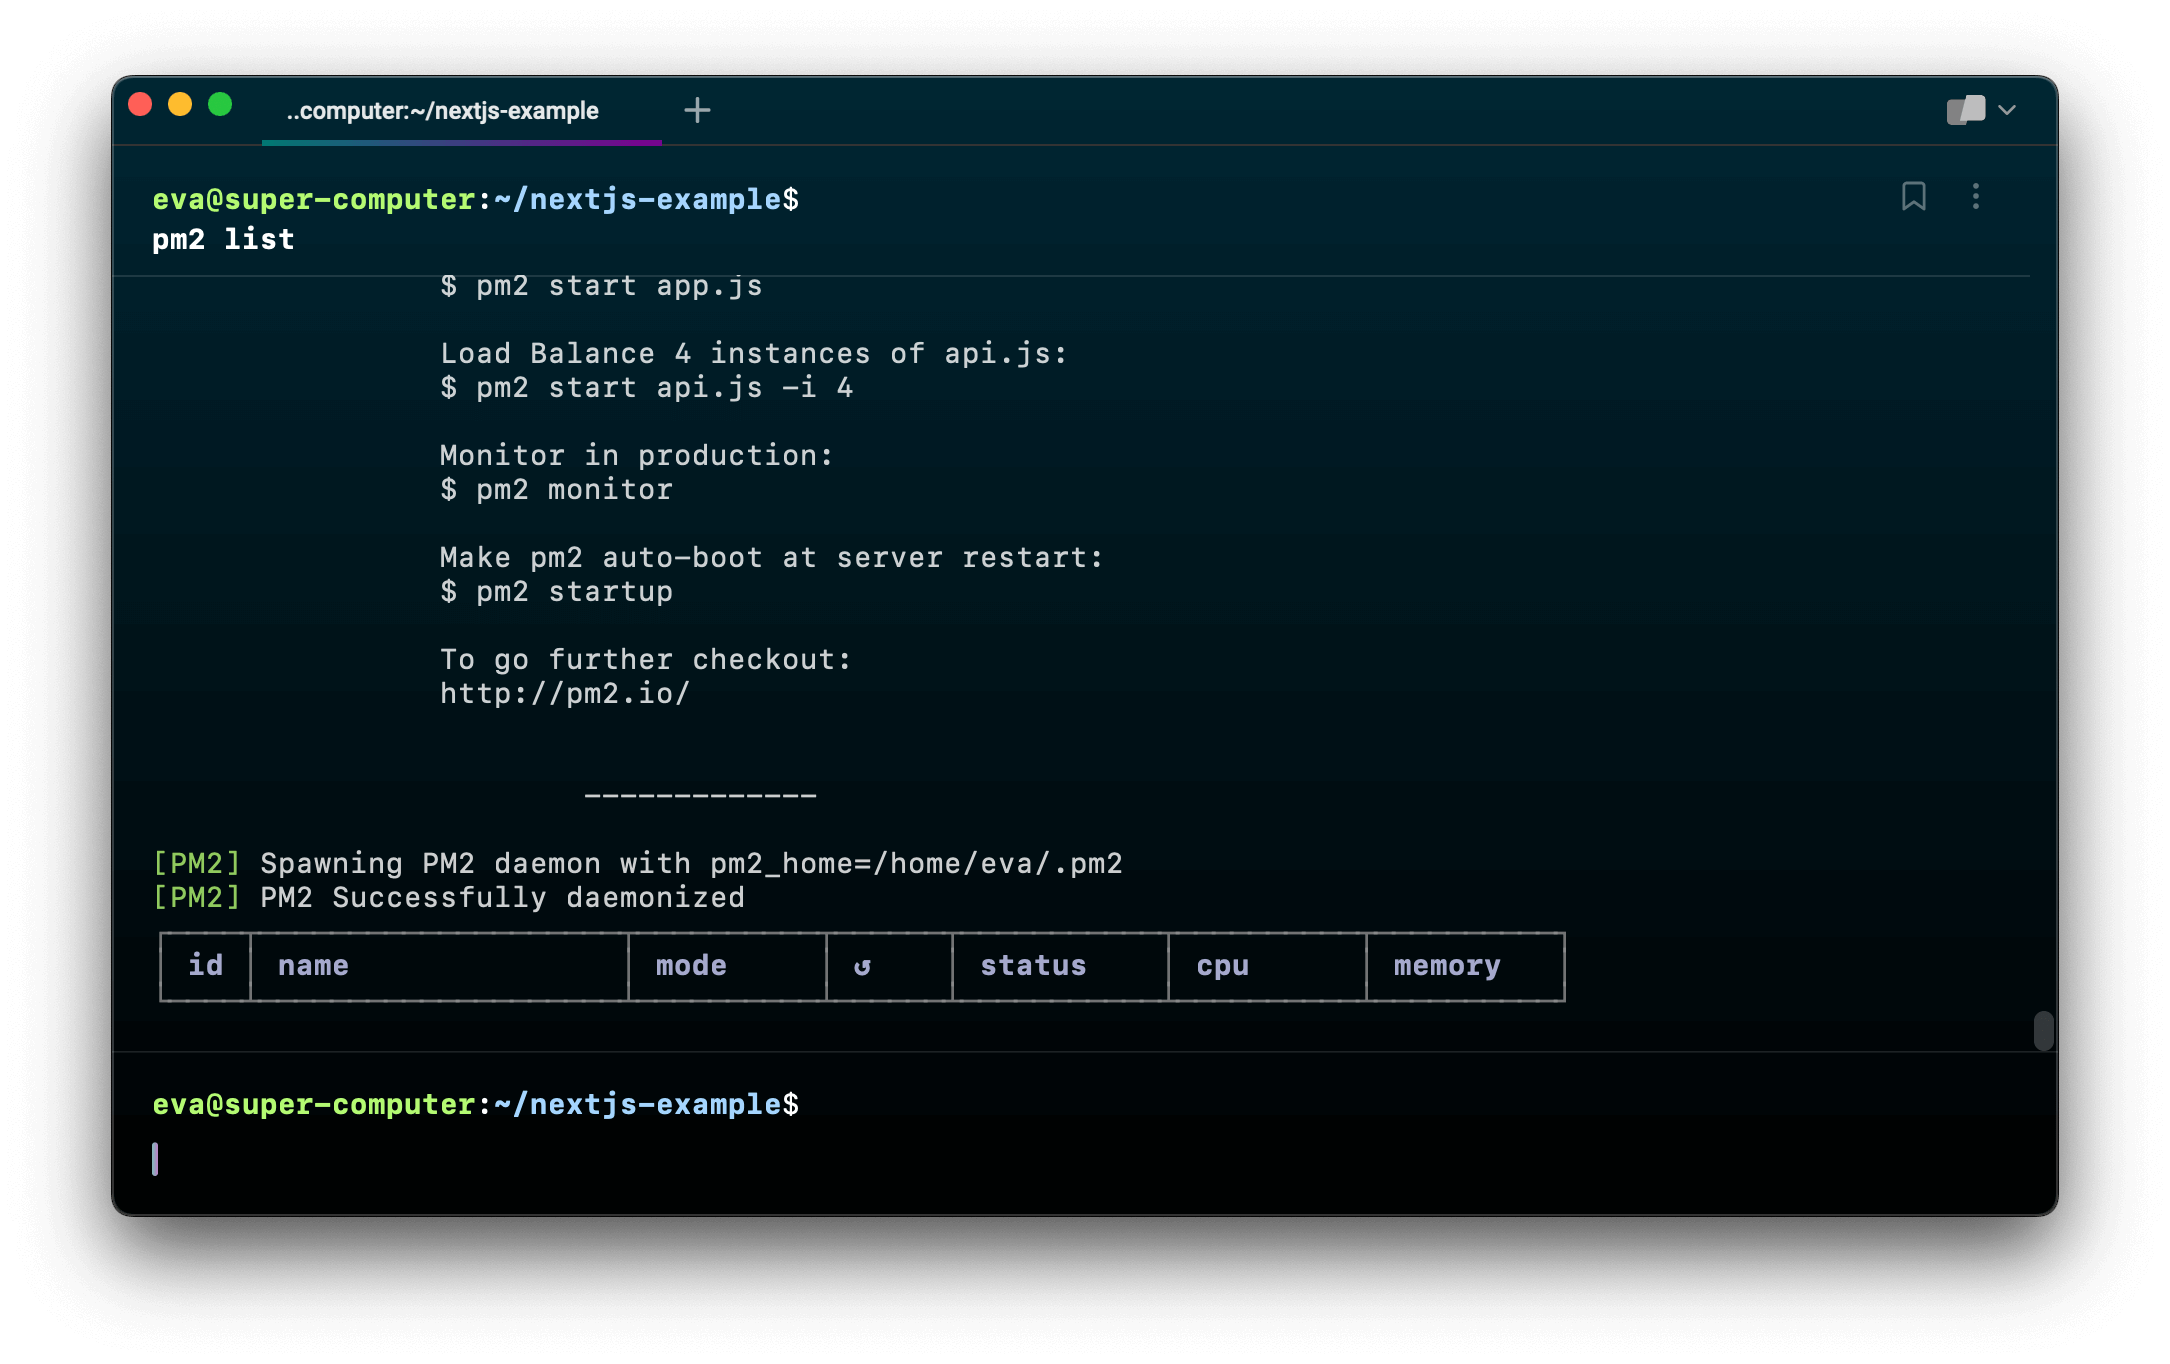
Install PM2
sudo npm install pm2 -gเมื่อติดตั้งเสร็จแล้วลองเรียกใช้ PM2 ด้วยคำสั่ง pm2 list
Run Next.js with PM2
เราจะใช้ PM2 ในการ Run Next.js โดยความสามารถของ PM2 คือ จะรัน Next.js Project หรือ Node.js ให้เป็น Background ได้ ง่ายก็คือ เราปิด Terminal ไป Project ก็ยังรันอยู่
โดยคำสั่งที่ใช้ Run Next.js ด้วย PM2 ก็ตามนี้เลย
pm2 start yarn --name nextjs-example -- startเมื่อ Run แล้ว เราจะใช้คำสั่ง pm2 list จะเห็นว่ามี Process ที่ชื่อว่า nextjs-example แล้ว
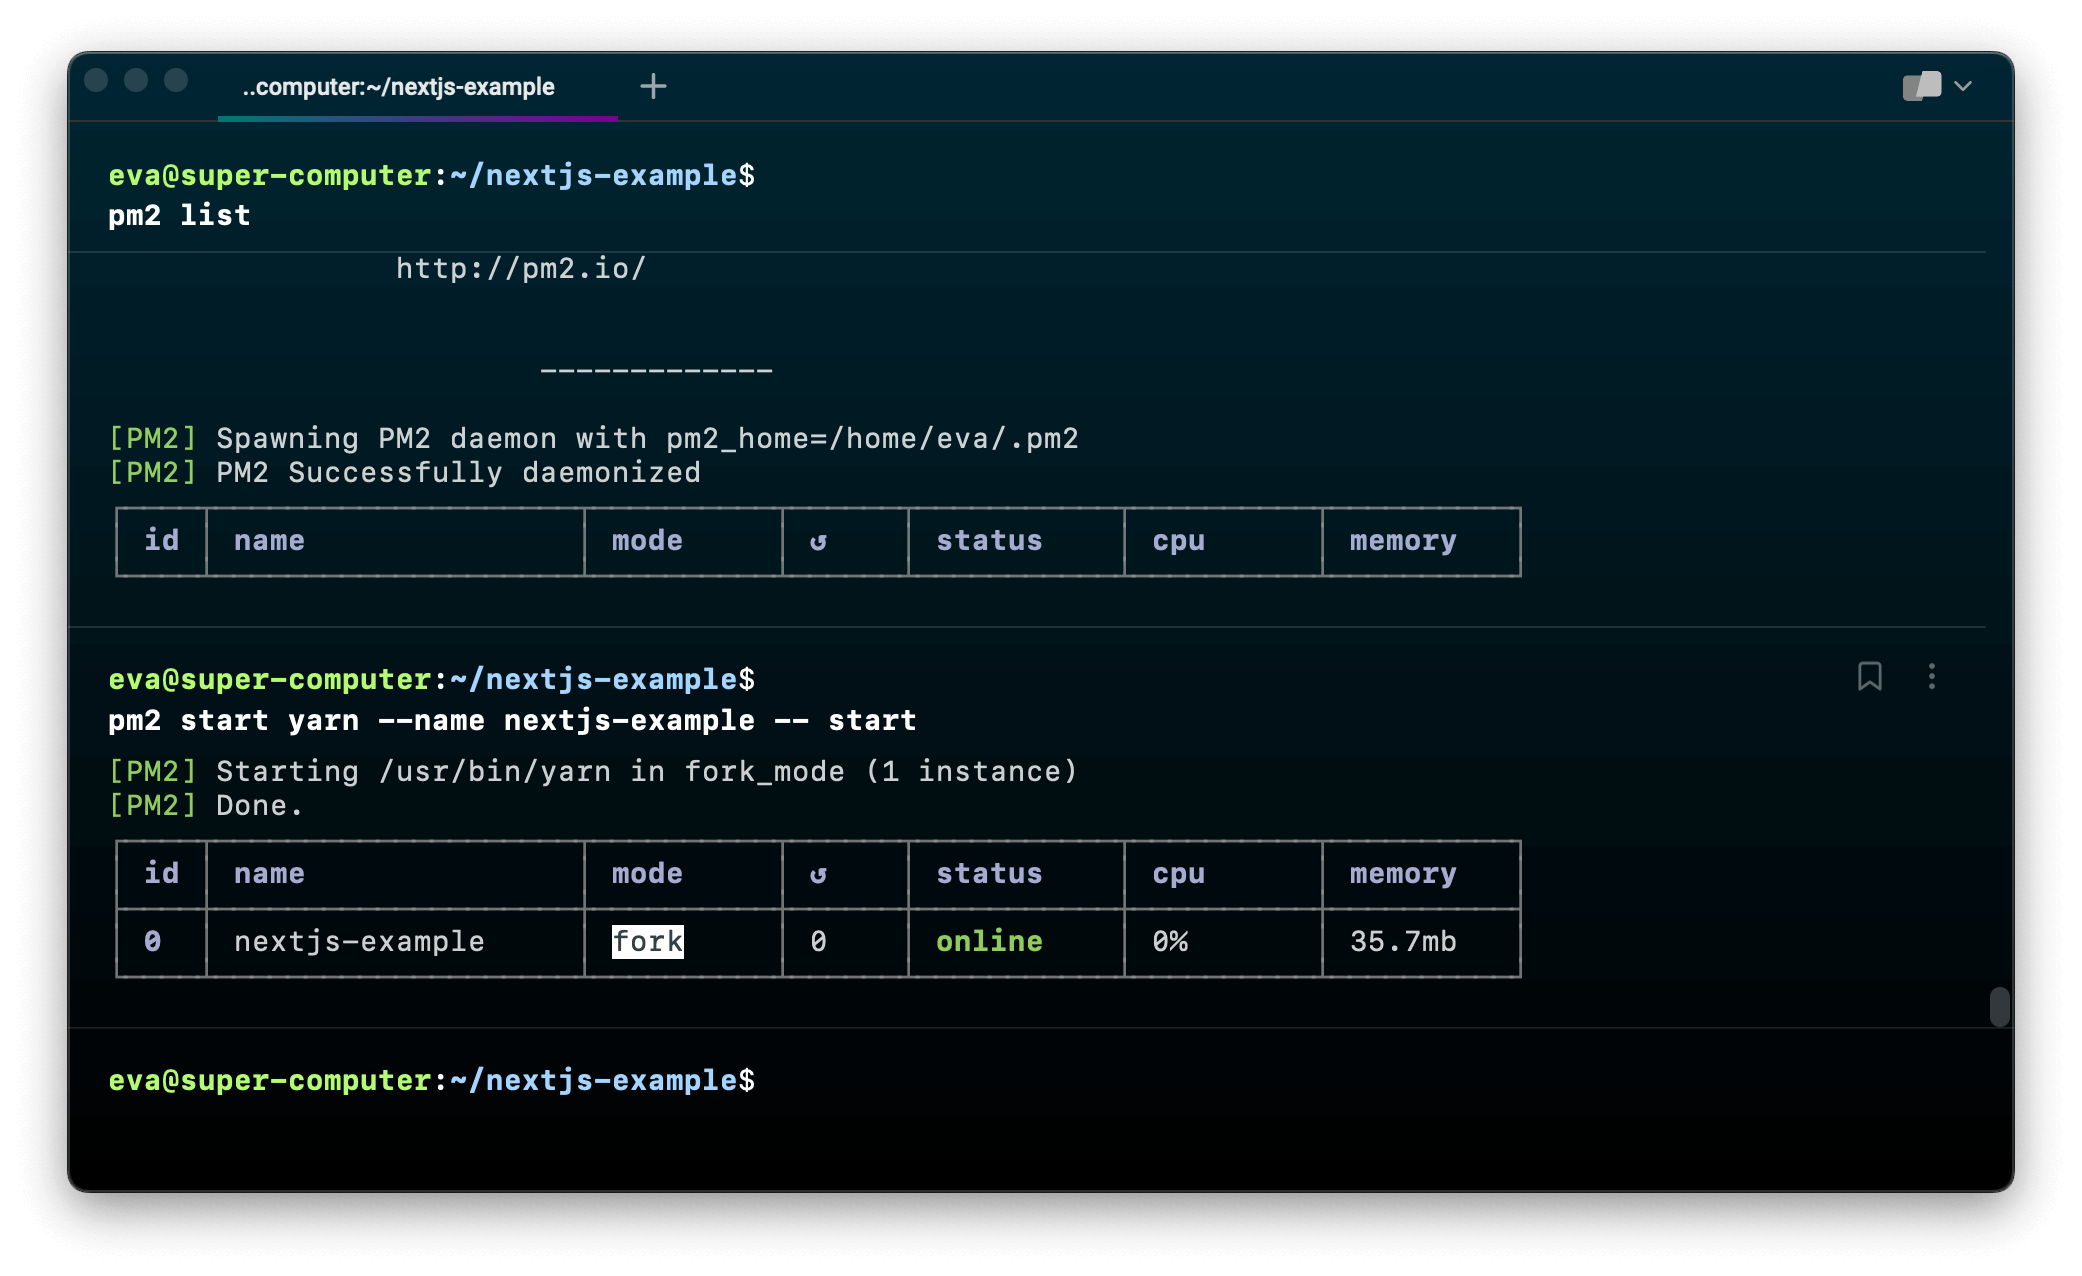
อธิบายแต่ละคำสั่ง
pm2คือคำสั่งเรียกใช้ PM2startคือ อยากให้ PM2 รันอะไร ในที่นี้คือ startyarnคือ คำสั่งที่เราต้องการให้ PM2 รัน ในที่นี้คือ yarn--nameคือ ตั้งชื่อ ให้กับ Process ที่ PM2 รันnextjs-exampleคือชื่อของ Process ที่ PM2 รันstartคือ คำสั่งที่ใช้รัน Next.js Project
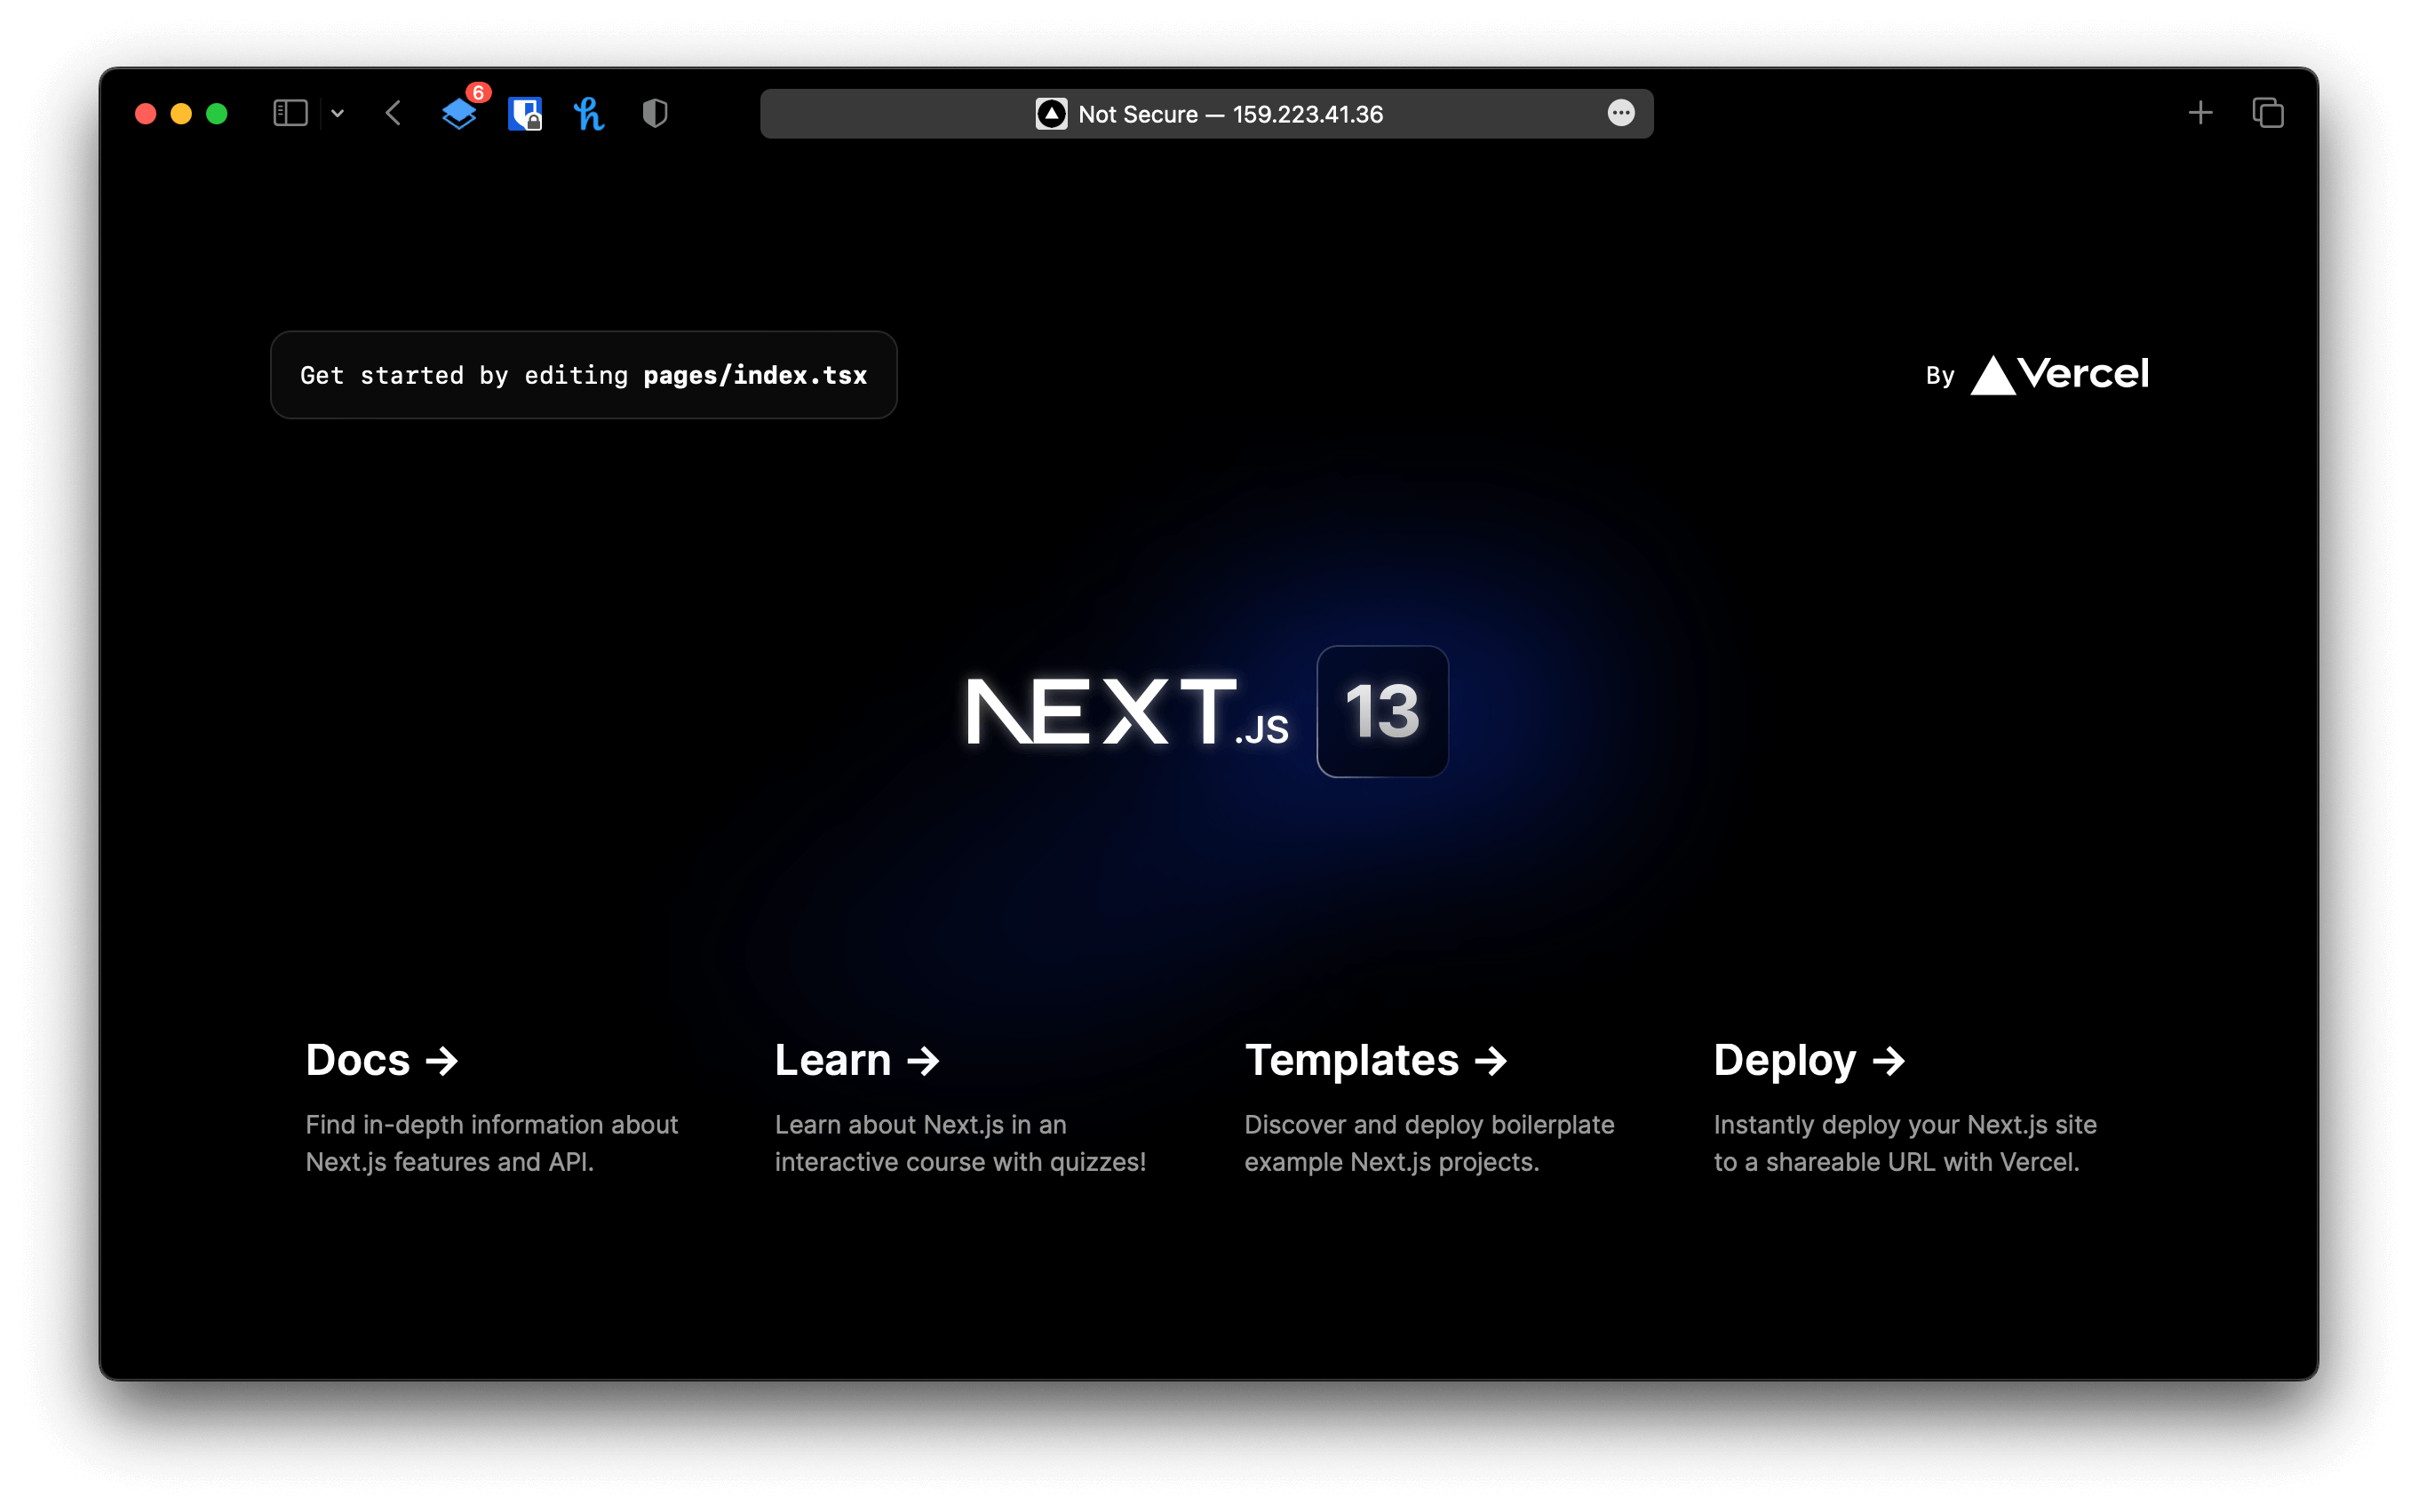
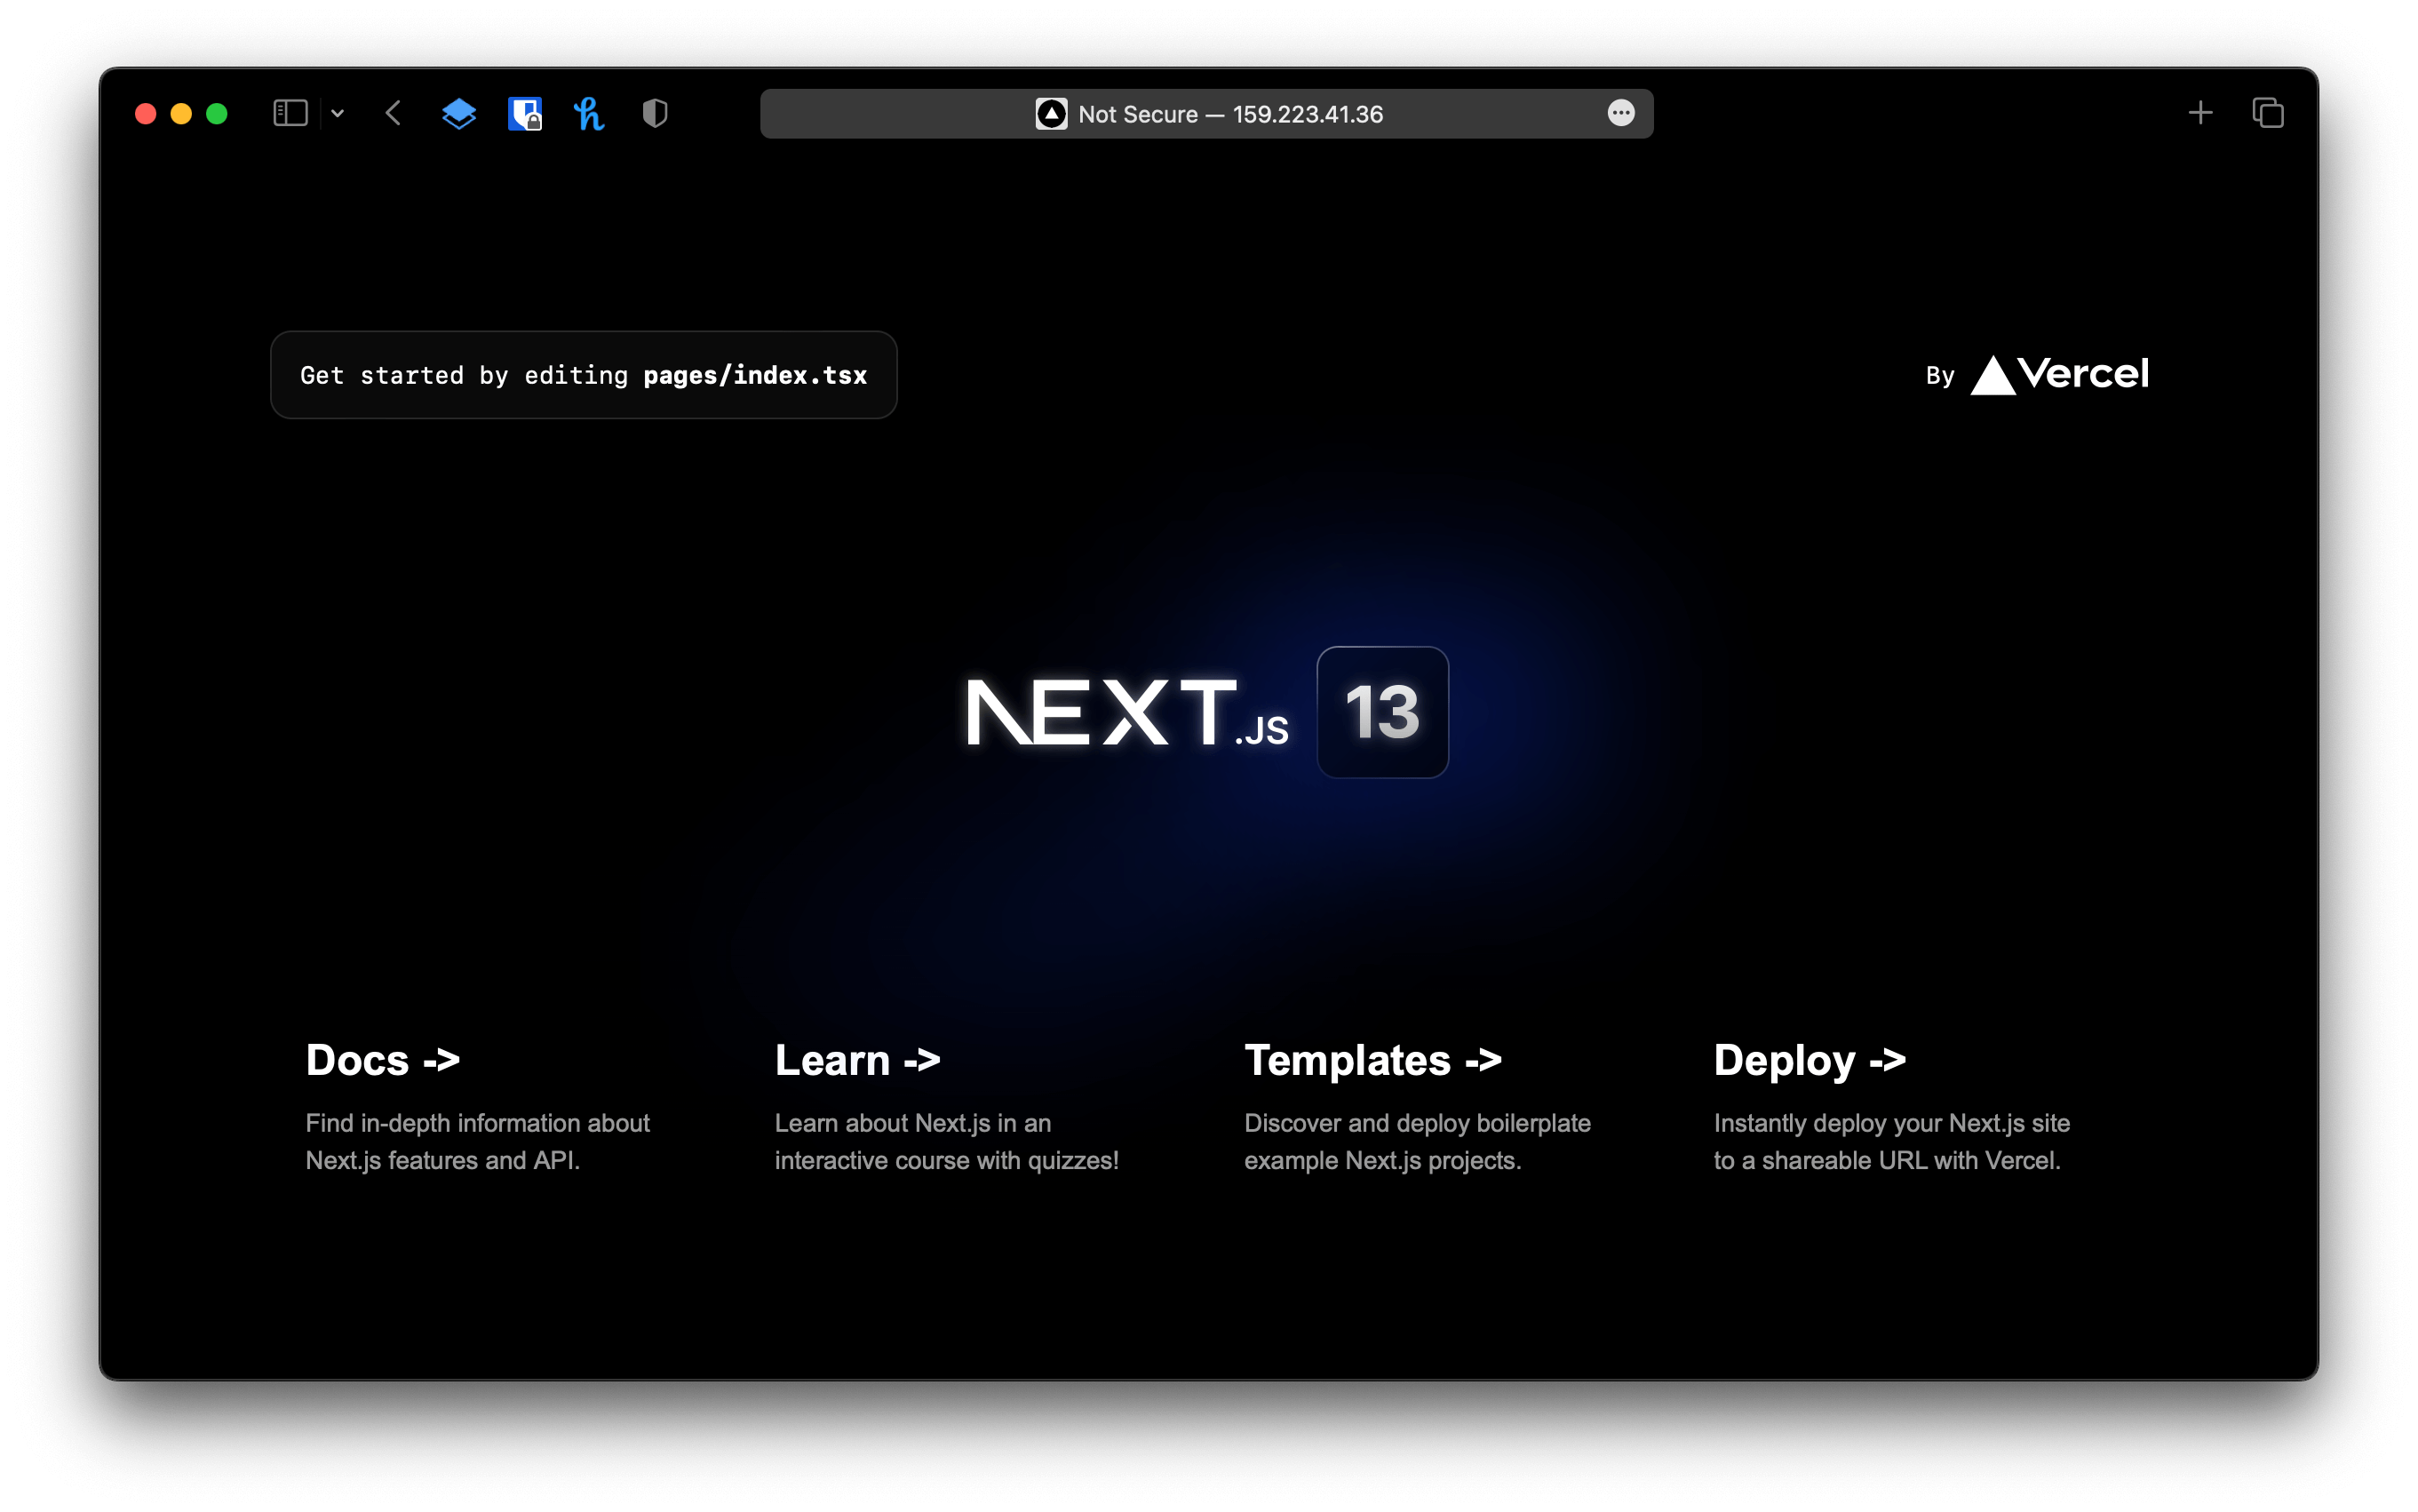
ลองเปิด Browser ไปที่ http://159.223.41.36:3000
Install the Nginx web server
ในขั้นตอนที่แล้วเมื่อเราจะเข้าดูโปรเจคเราผ่าน Web Browser จำเป็นที่จะต้องห้อยท้ายด้วย Port 3000 เสมอ เพราะเป็น Port ที่เราใช้ใน Next.js
ในขั้นตอนนี้ เราจะมาทำ Reverse Proxy ก็คือ เมื่อผมเข้า http://159.223.41.36 จะให้ Nginx ทำการ Redirect ไปที่ http://http://159.223.41.36:3000 โดยอัตโนมัติ
เอาละมาติดตั้ง Nginx กันเลย
sudo apt-get update
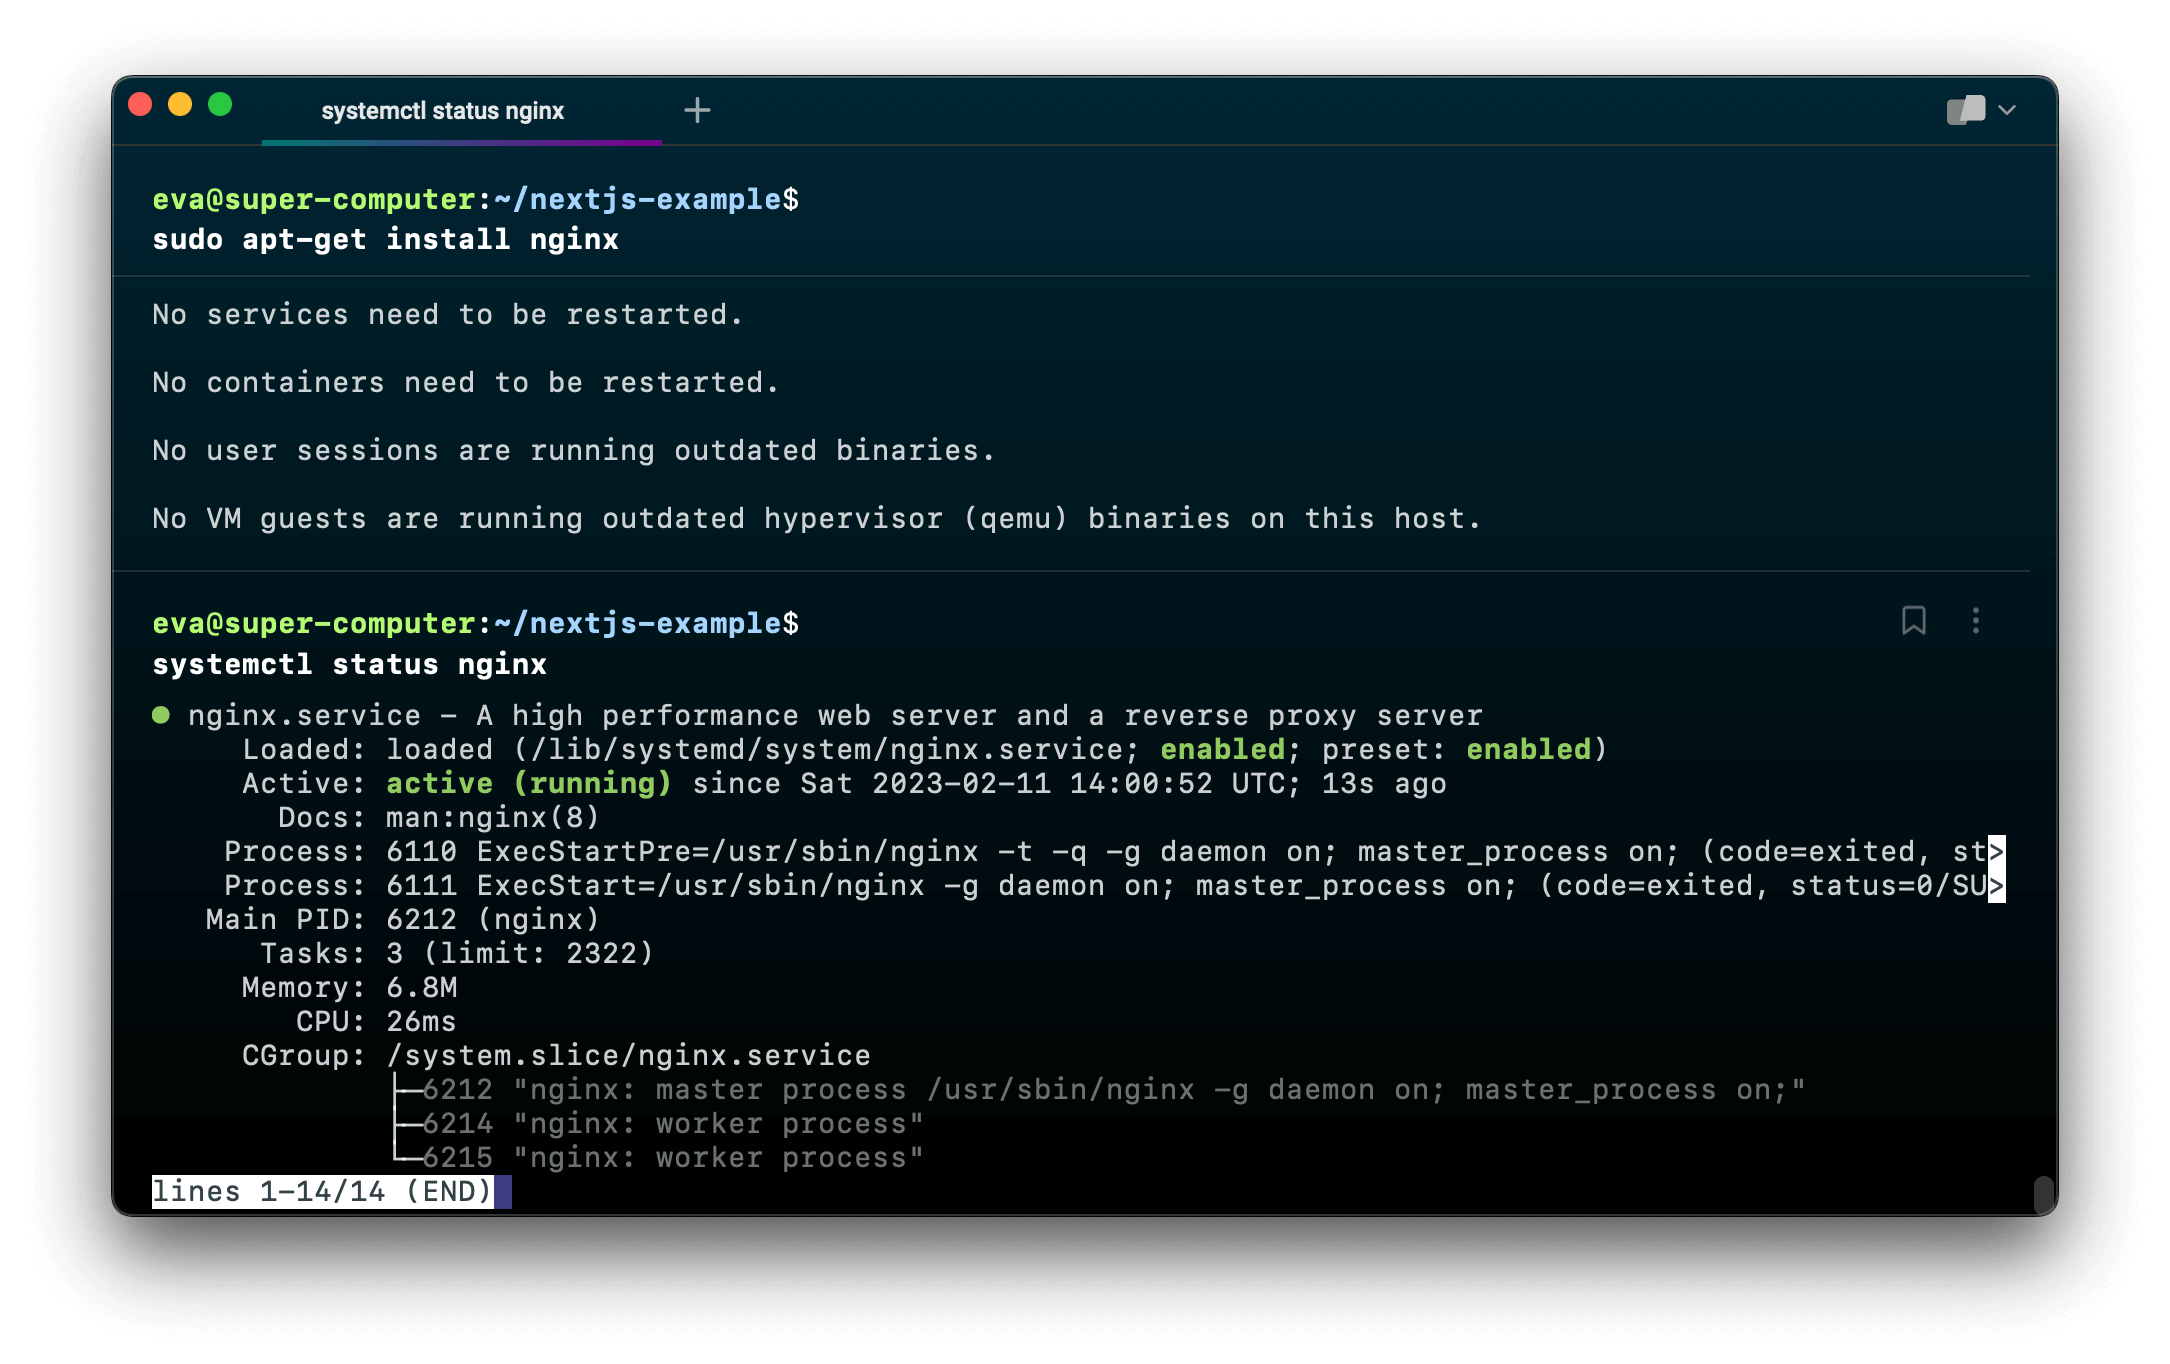
sudo apt-get install nginxเมื่อติดตั้งเสร็จ ลองเรียกใช้ Nginx ด้วยคำสั่ง
systemctl status nginxขึ้นแบบนี้เป็นอันว่าใช้ได้
Configure Nginx
โดยเราจะเข้าไปแก้ไฟล์ /etc/nginx/sites-available/default กันเล็กน้อย
sudo vim /etc/nginx/sites-available/defaultลบ code ที่ highlight ออก
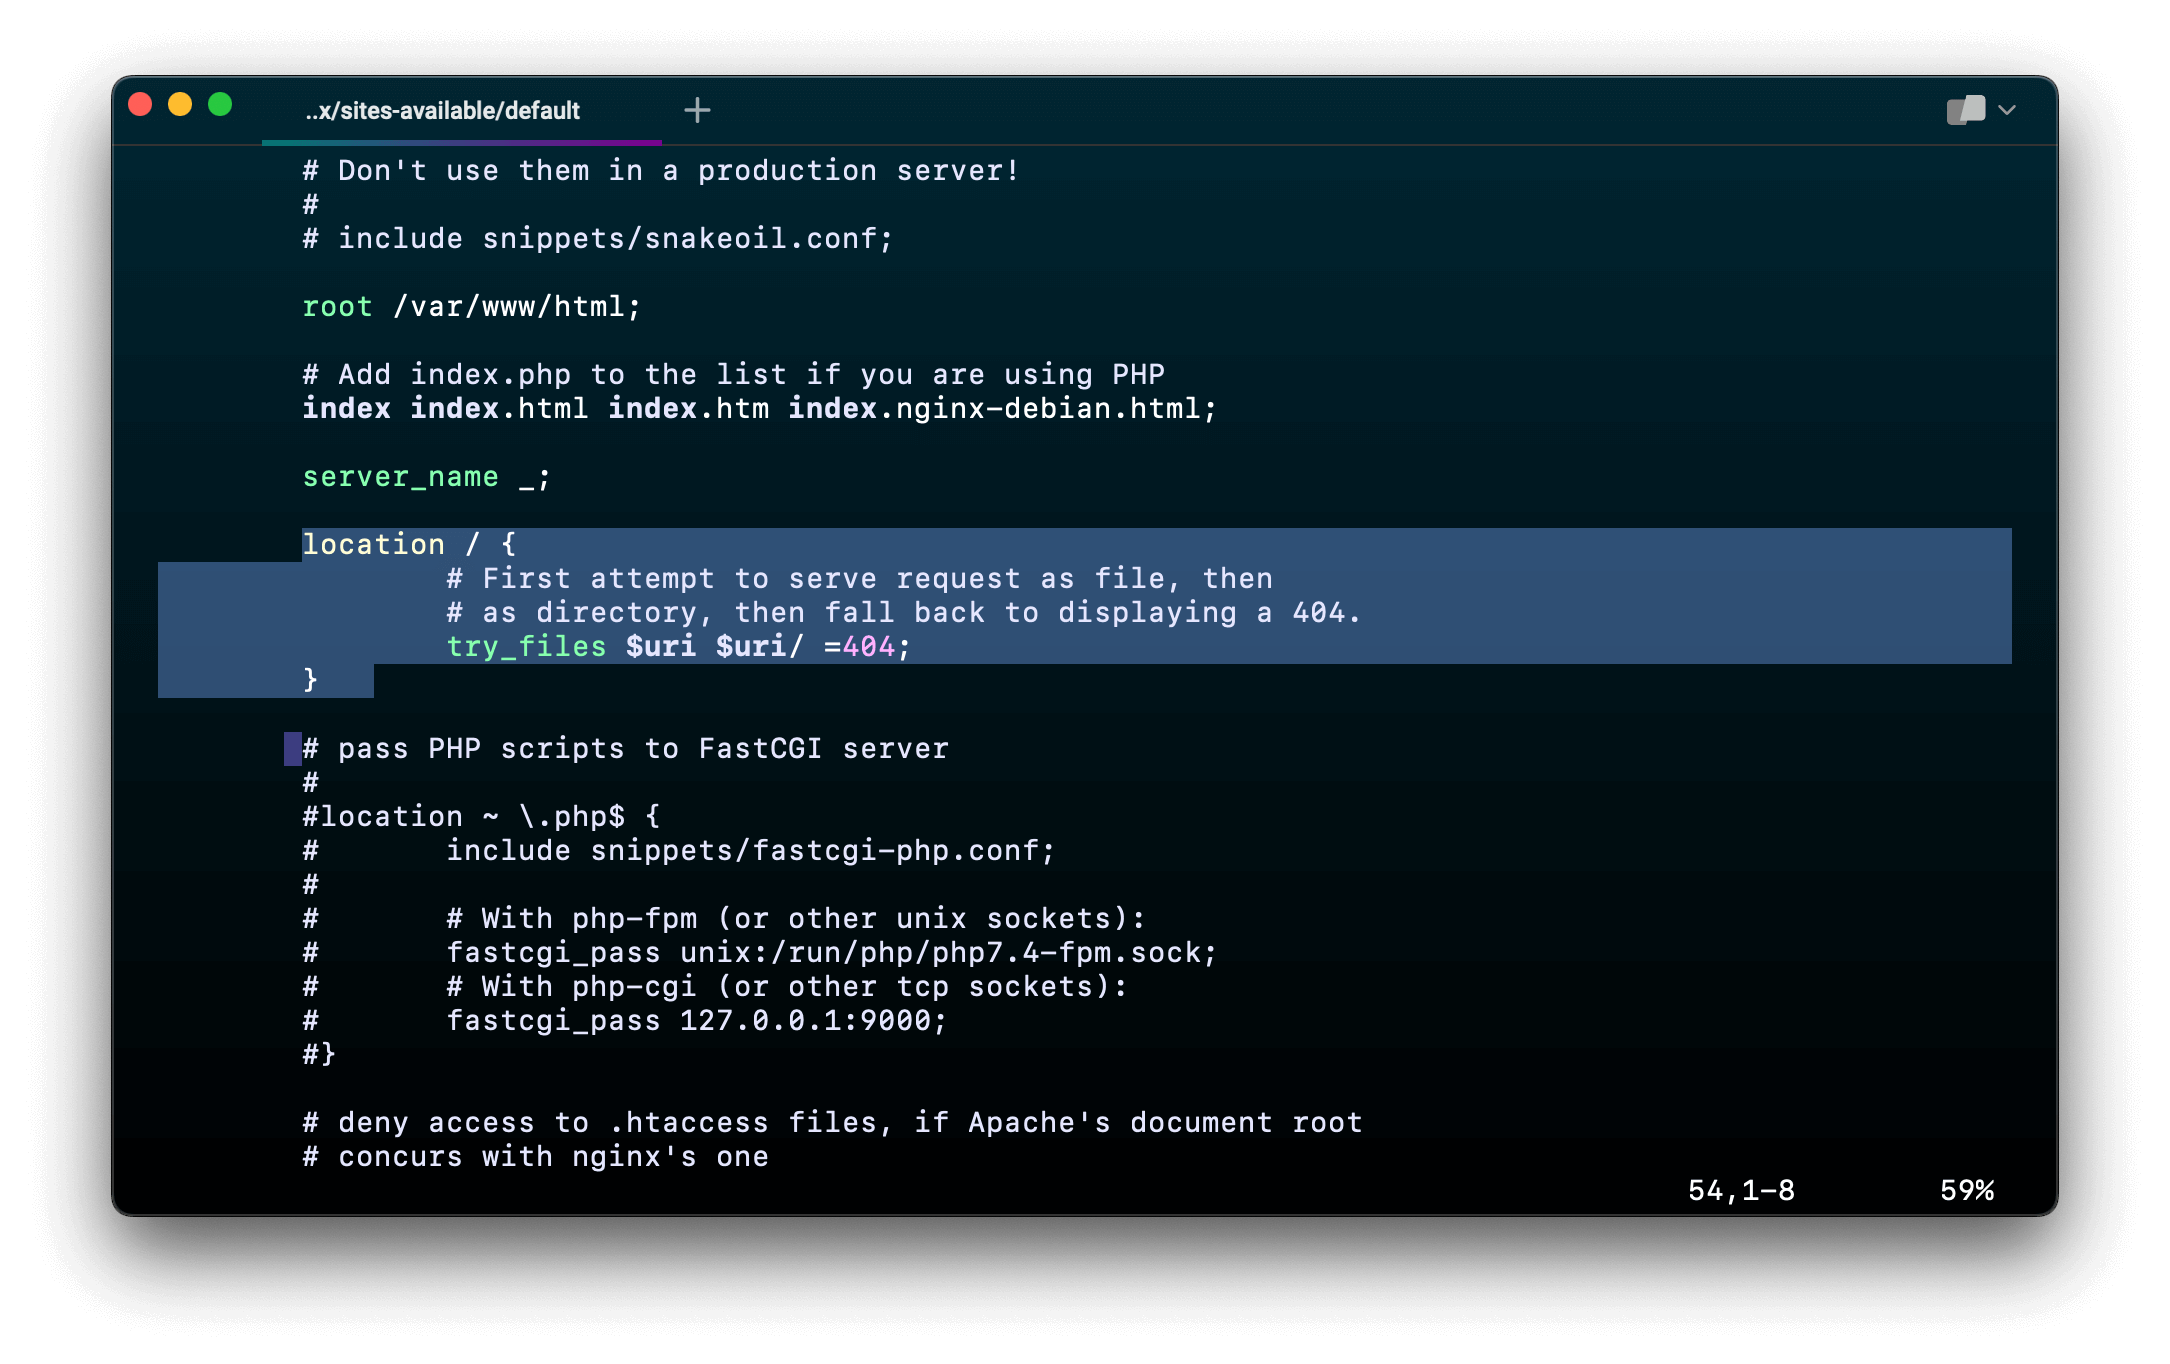
แล้วเพิ่ม code ด้านล่างนี้ลงไป
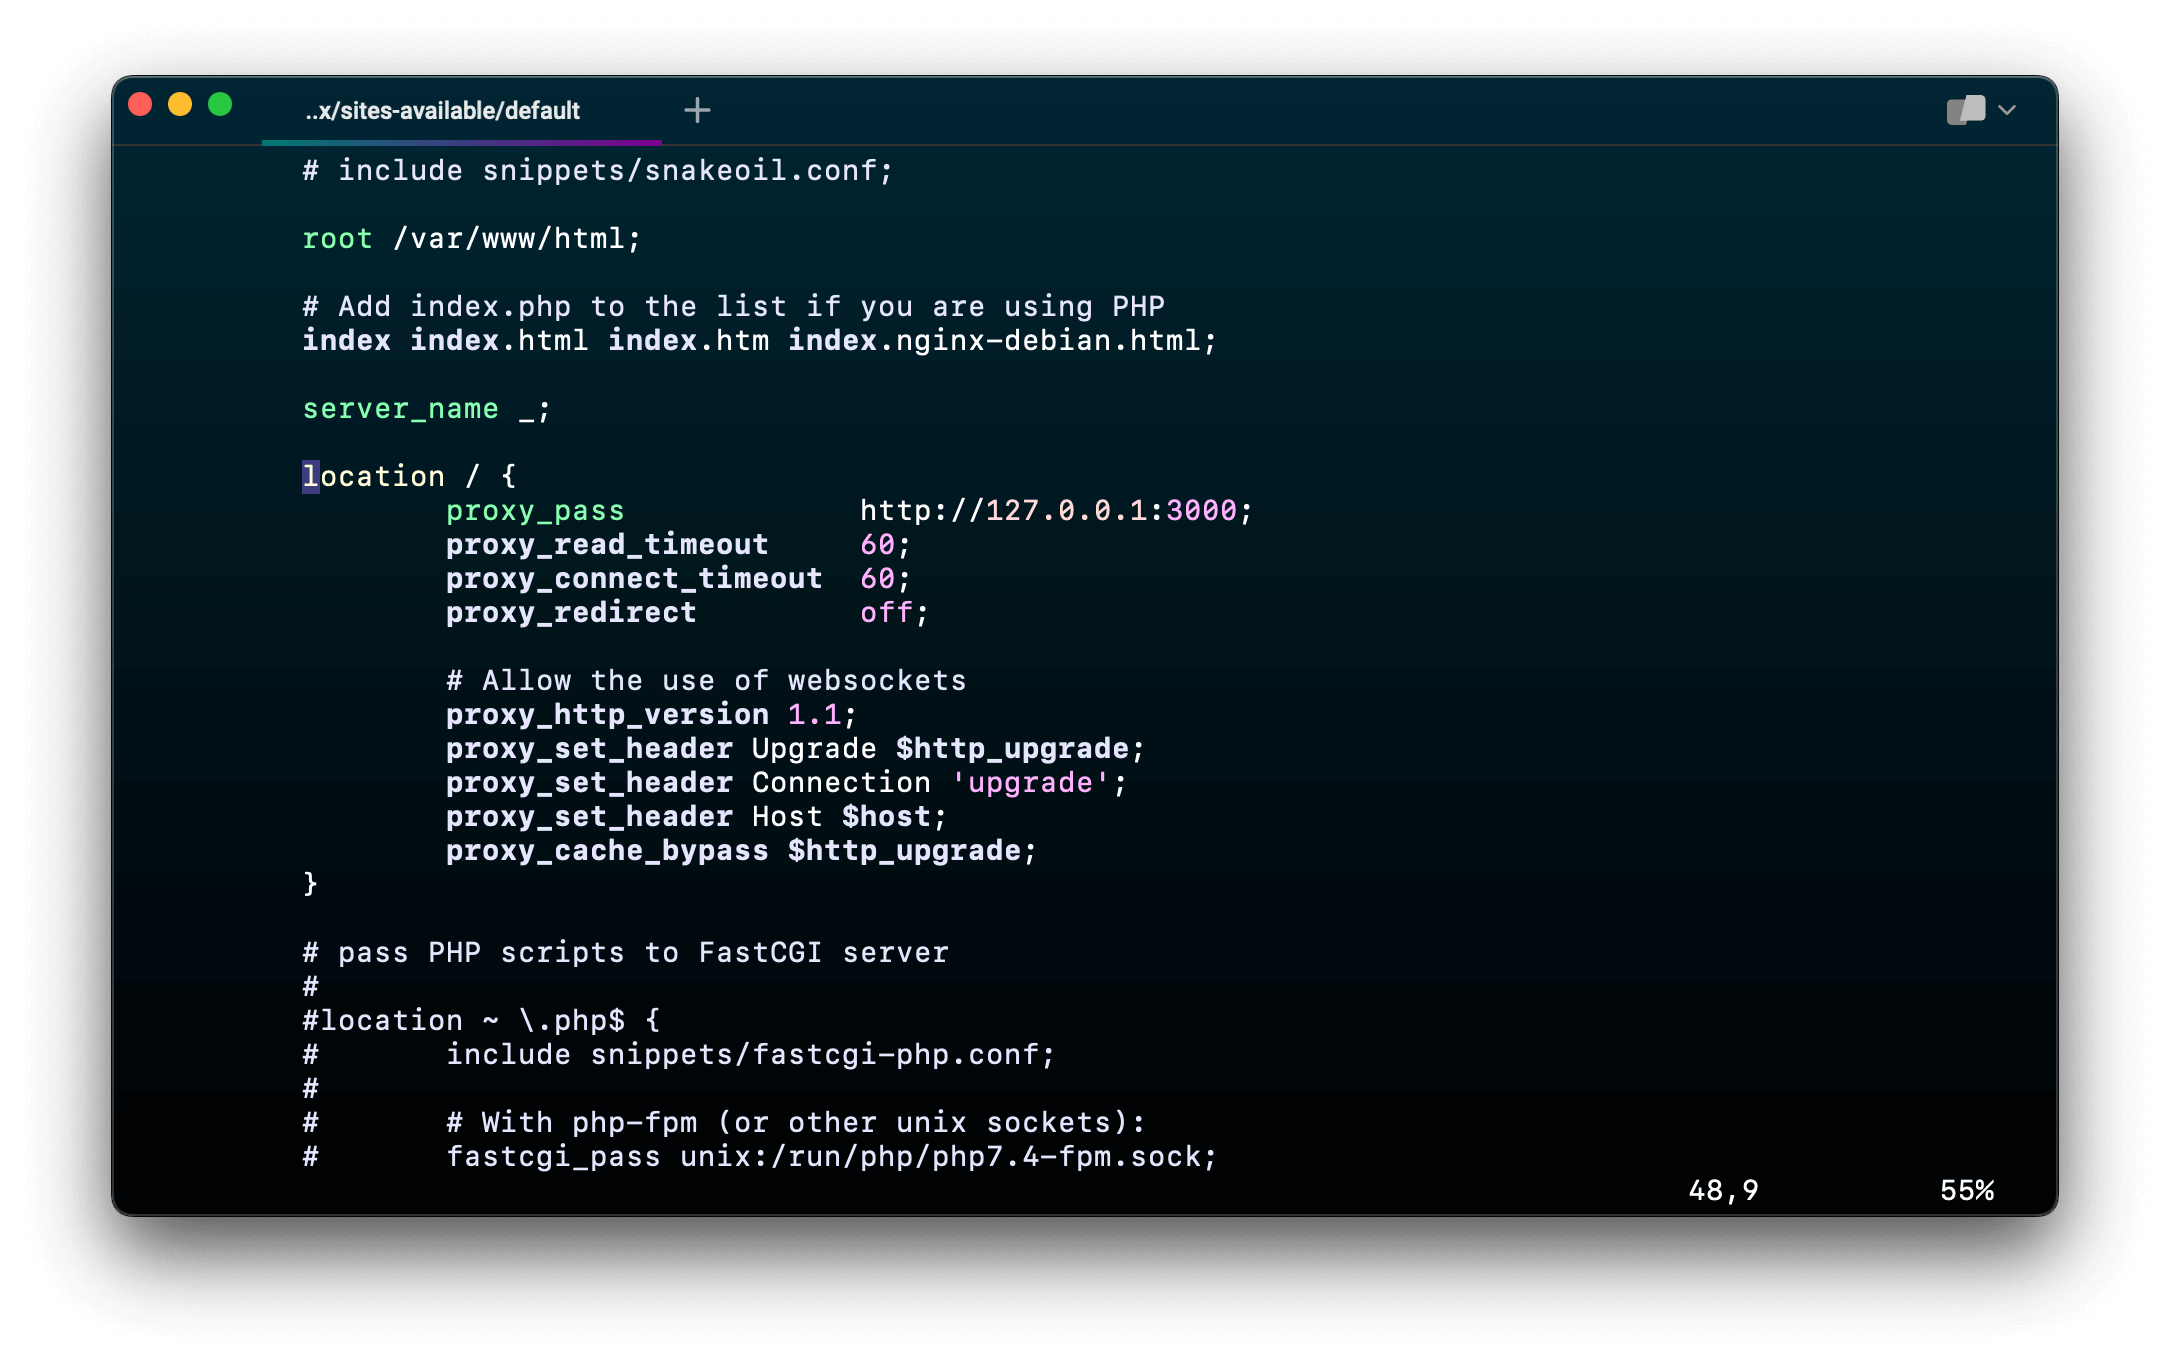
        location / {
                proxy_pass             http://127.0.0.1:3000;
                proxy_read_timeout     60;
                proxy_connect_timeout  60;
                proxy_redirect         off;

                # Allow the use of websockets
                proxy_http_version 1.1;
                proxy_set_header Upgrade $http_upgrade;
                proxy_set_header Connection 'upgrade';
                proxy_set_header Host $host;
                proxy_cache_bypass $http_upgrade;
        }
Restart Nginx
เมื่อเราแก้ไขไฟล์เสร็จแล้ว ให้ Restart Nginx Service ด้วยคำสั่ง
sudo systemctl restart nginxเพียงเท่านี้เราก็สามารถเข้าไปดูโปรเจคของเราผ่าน Web Browser โดยไม่ต้องใส่ Port 3000 ได้แล้ว